The Chat Widget is a fully customizable tool that takes care of support and growth. Offer website visitors several ways to get in touch with your business, including Messenger, WhatsApp, email, and phone, all in one chat widget.
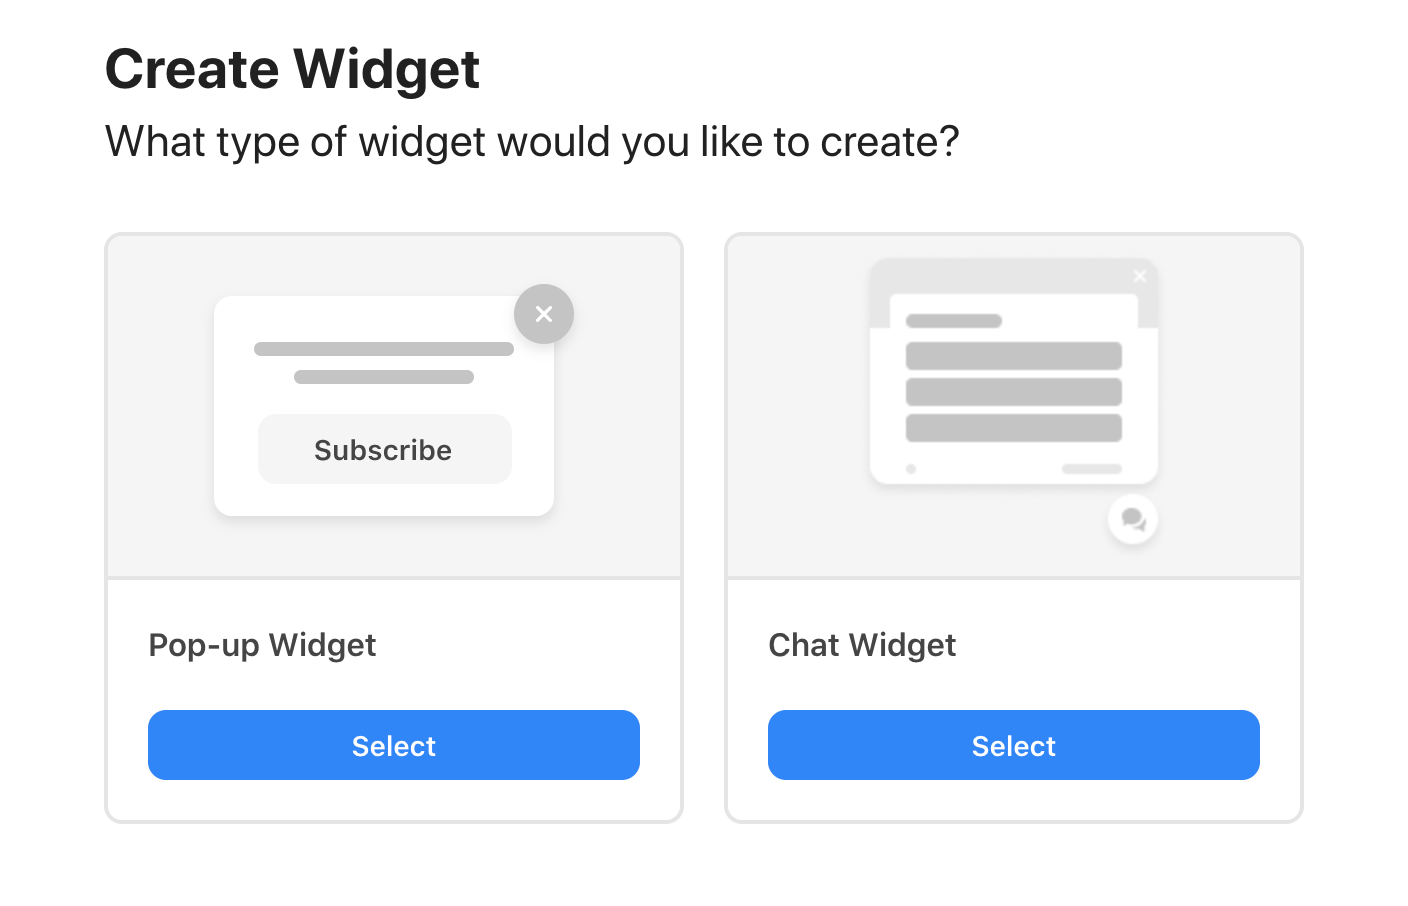
Step 1. Create a new widget
Go to the ‘Widgets’ tab in the ‘Automations’ section of the POP dashboard to create your first Chat Widget. Manage your existing widgets or click the big blue button to create a new one.
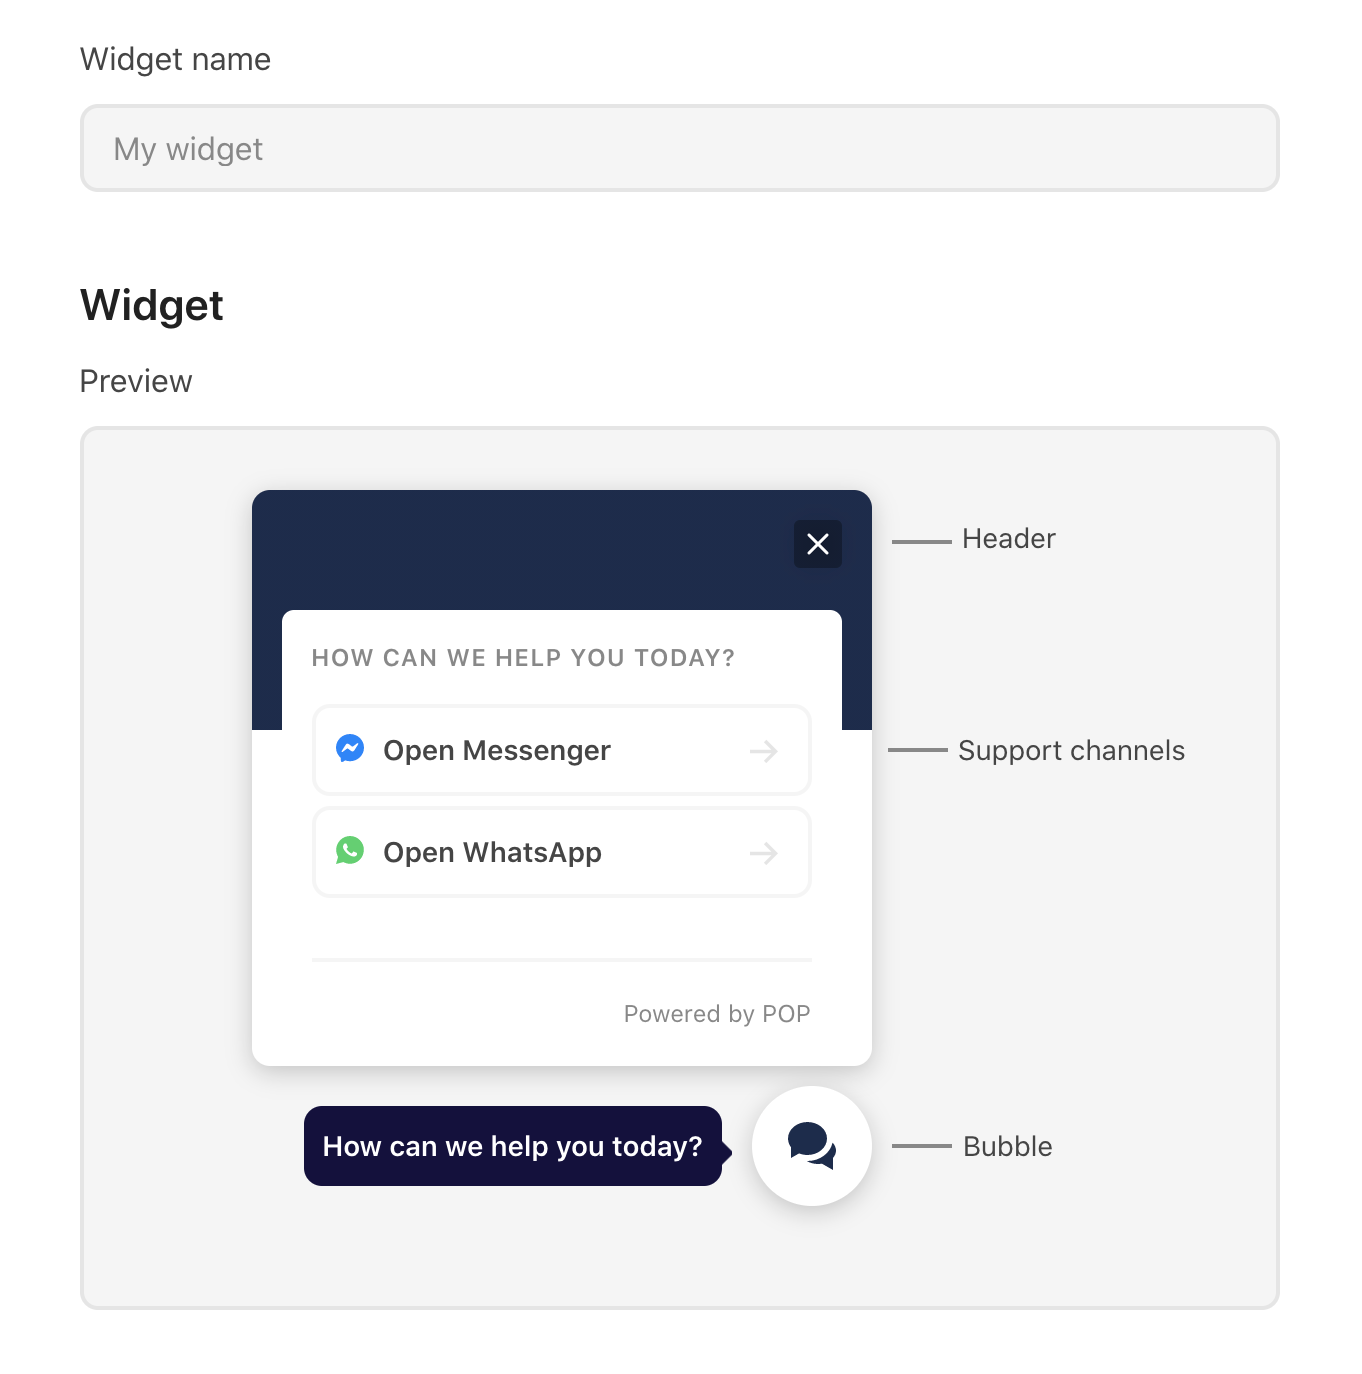
Step 2. Name and preview your Chat Widget
First of all, name your widget and take a look at the preview. This preview is dynamic, so any changes you make will automatically be reflected.
Note: As you customize the widget, you'll need to scroll back up to the preview to see your changes.
Step 3. Customize your header
Get started by customizing your Chat Widget's header. Click on the color field to open the color picker or enter a hex color code. Next, upload your company logo. The optimal image size here is 200x70 pixels.
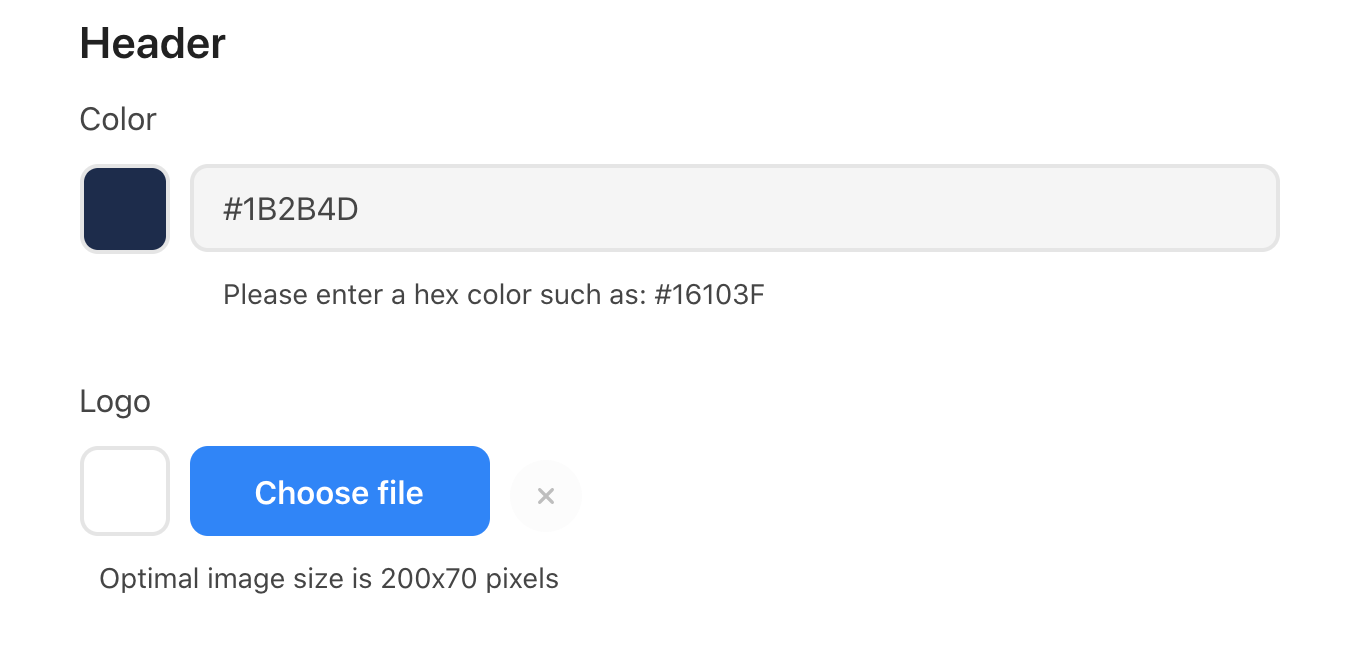
Make sure you preview the changes to make sure you're happy.
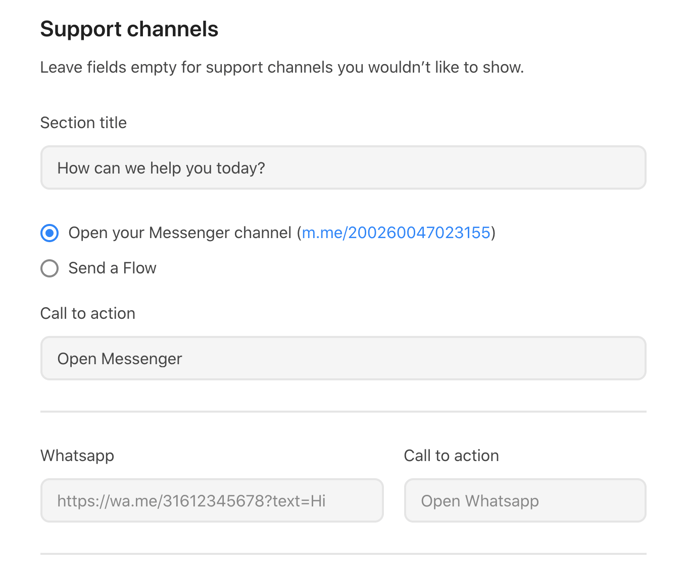
Step 4. Add your support channels
You can add several support channels to your Chat Widget. First, edit the section title copy. Next, choose whether you'd like your Messenger CTA to open your general Messenger channel, or link to a specific Flow on your bot.
You can add lots of extra channels:
- Phone number
- FAQs
For WhatsApp, you will need to add a 'wa.me' link and set up WhatsApp for Business, or create one using your private phone number.
If you need more information on how to set up the WhatsApp Business App and use short links instead, please read the following post on our blog.
To create a 'wa.me' link, use https://wa.me/<number> where the <number> is a full phone number in international format. Omit any zeroes, brackets, or dashes when adding the phone number in international format.
Examples:
Use: https://wa.me/1XXXXXXXXXX
Don't use: https://wa.me/+001-(XXX)XXXXXXX
Add as many support channels you want, or leave some of the fields empty to remove these from your Chat Widget.
Step 5. Add promotions
There's a separate section of the Chat Widget that allows for a maximum of 3 extra promotional buttons. These can be links to a Messenger Flow or to an external website. A good use case for a Messenger promotion, here, would be to offer a discount and use our ecommerce coupon template.
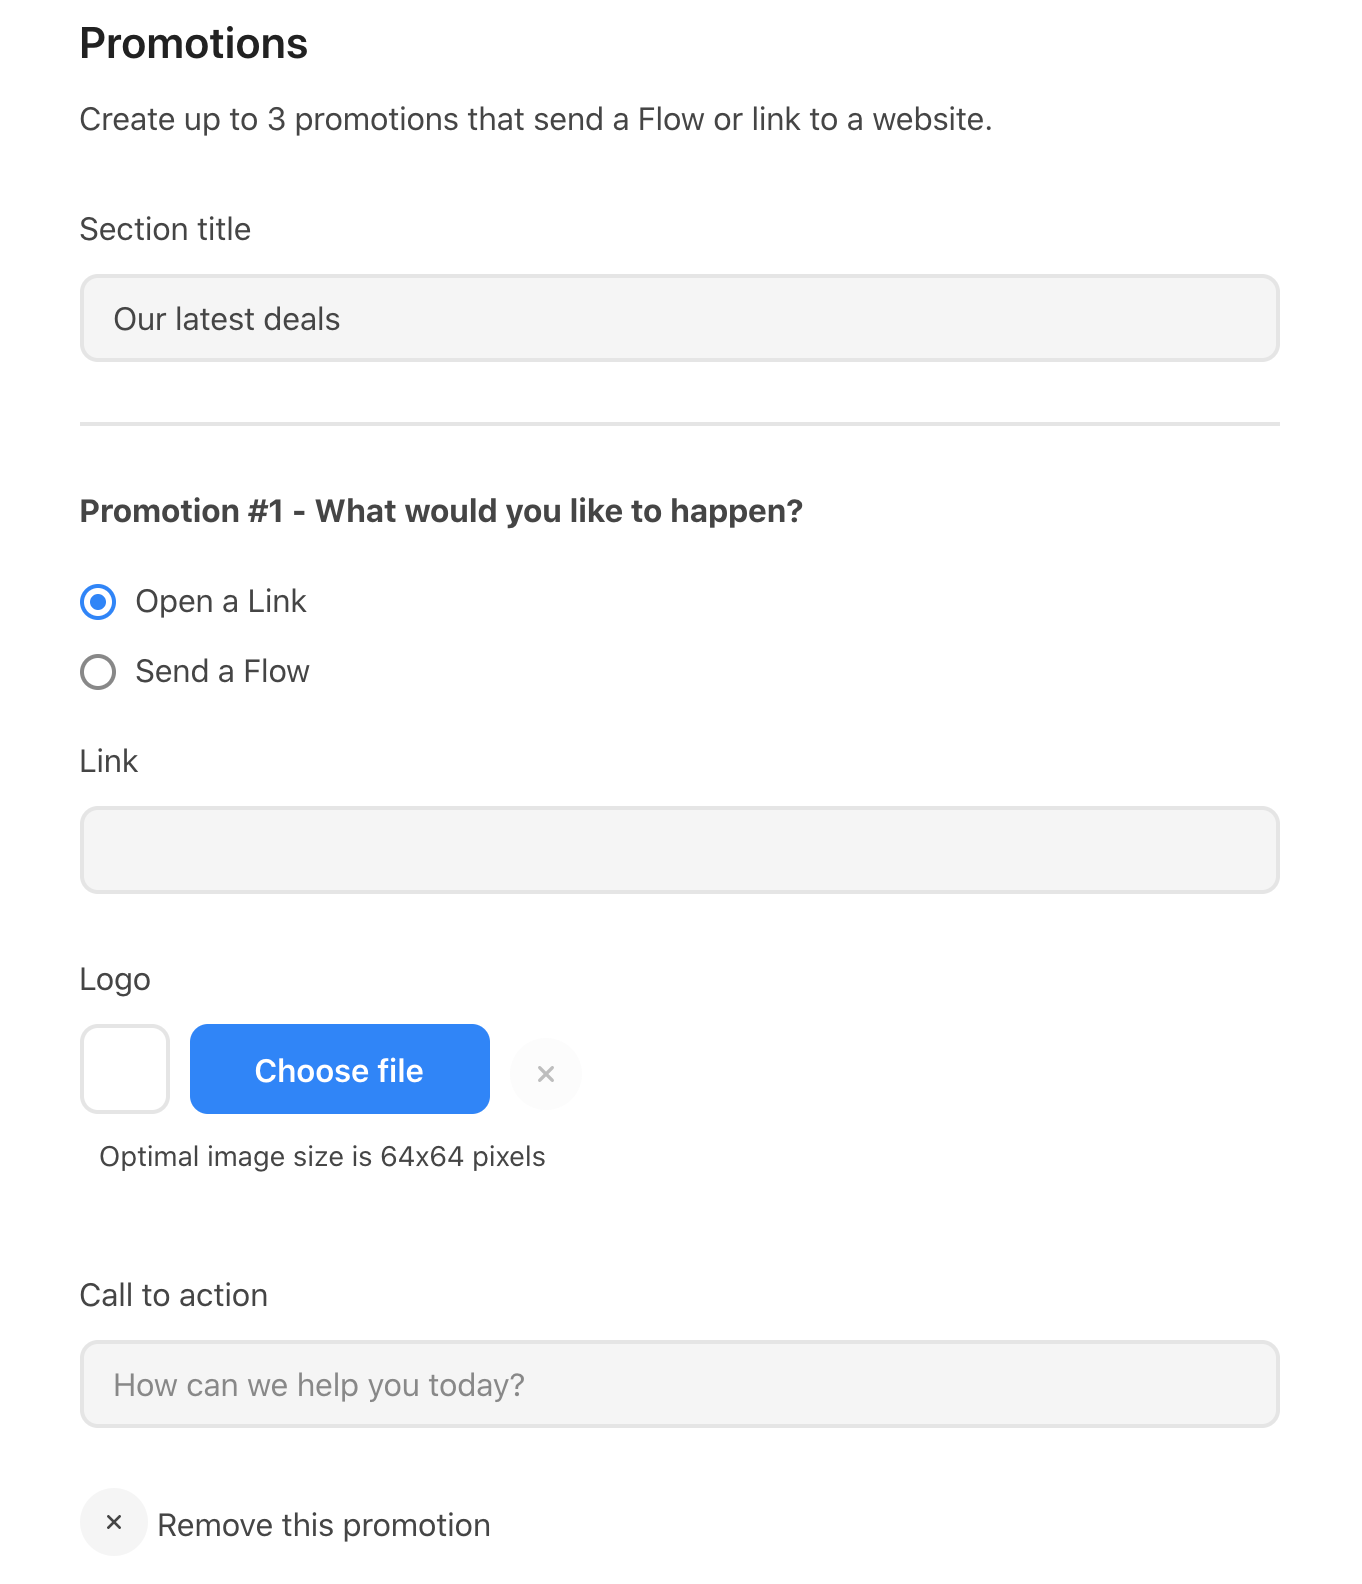
You can also add a logo that appears next the promotional button. The optimal image size here is 64x64 pixels. Make sure you scroll up and preview your Chat Widget to make sure these logos look good.
Step 6. Customize your chat bubble
Next up: customize your Chat Widget's chat bubble. You can use the color fields to open the color picker, or use hex colors instead.
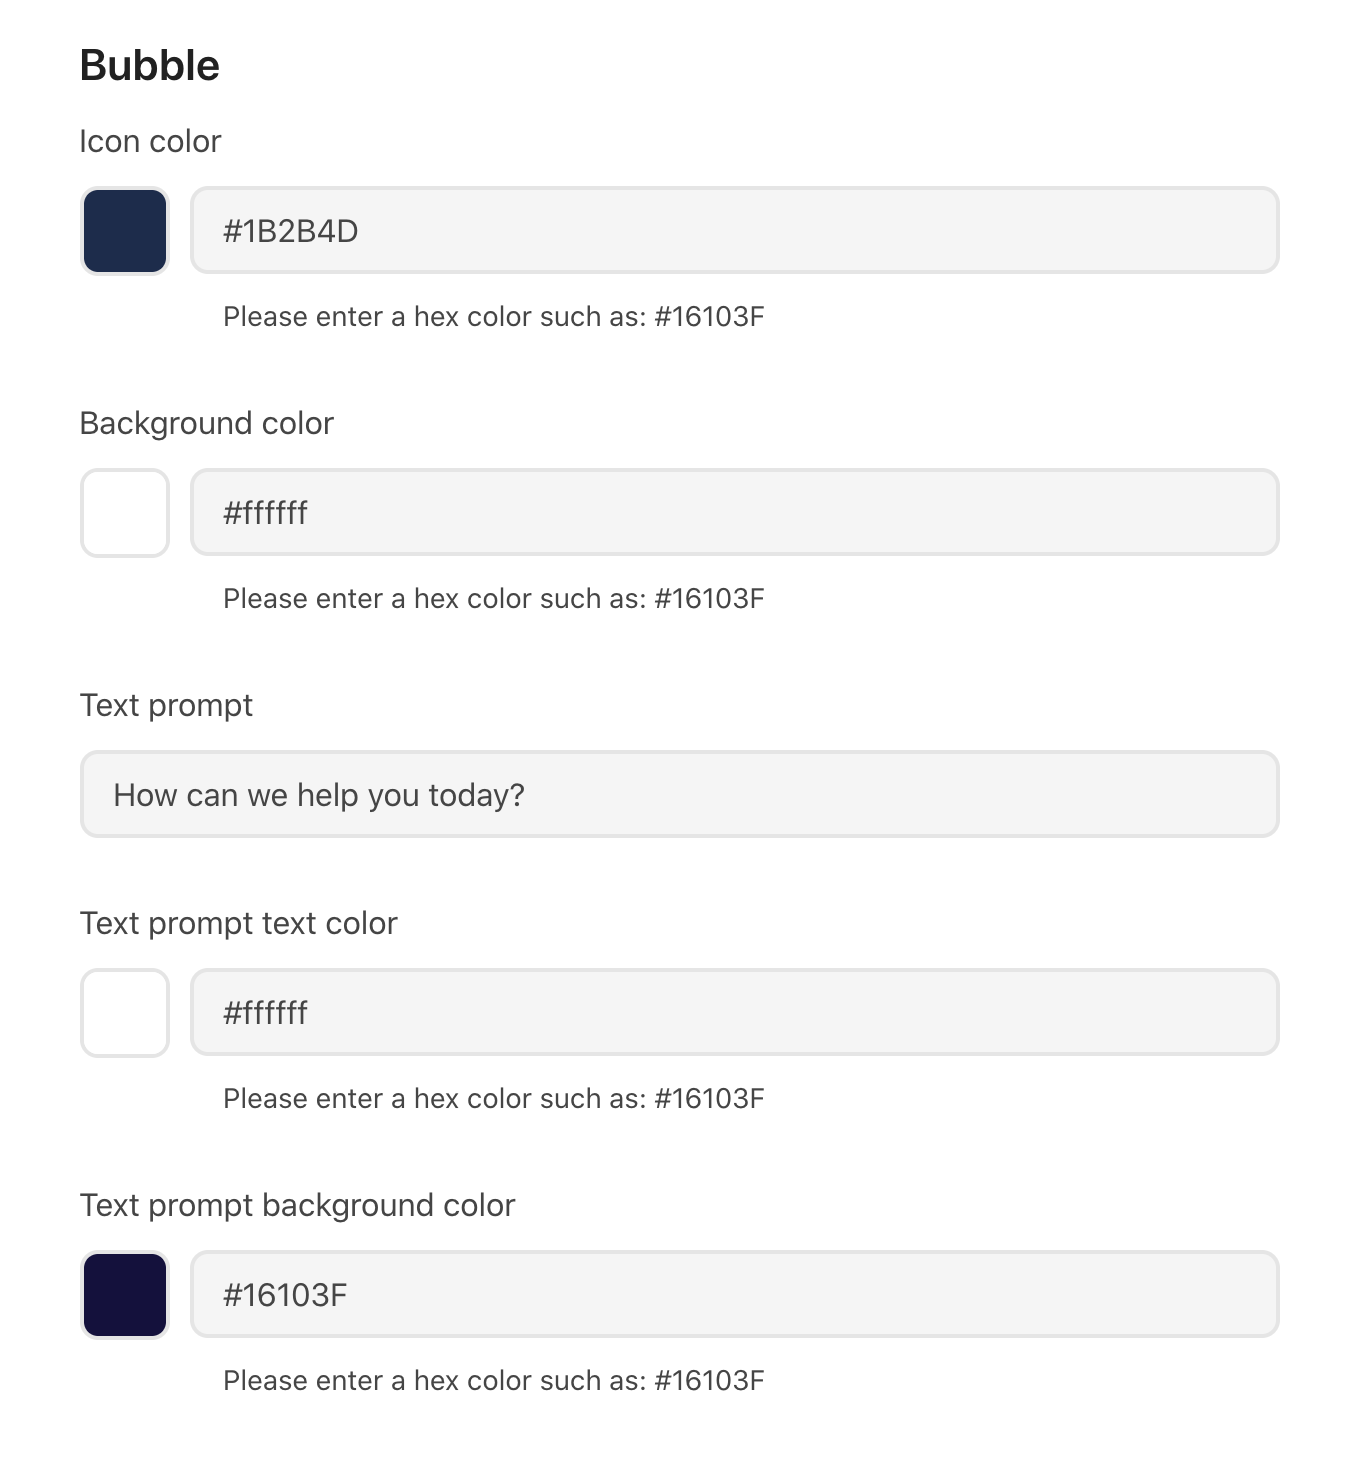
It's important that you think about what text prompt to use, as this is the CTA for website visitors to open your Chat Widget. Make it pop!
Step 7. Install the widget on your website
To install the widget on your website, you just need to authorize your domain and add a snippet of code to the <head> part of every page on your website. You can use a tag managing tool like Google Tag Manager to do this. You’ll only need to add this snippet to your website once.
Note: once you've added the snippet to your website, you can skip this step when creating another widget.
If you’d like the Chat Widget to only pop up on a specific page on your website, simply add the URL for that page in step 1 of the installation modal.
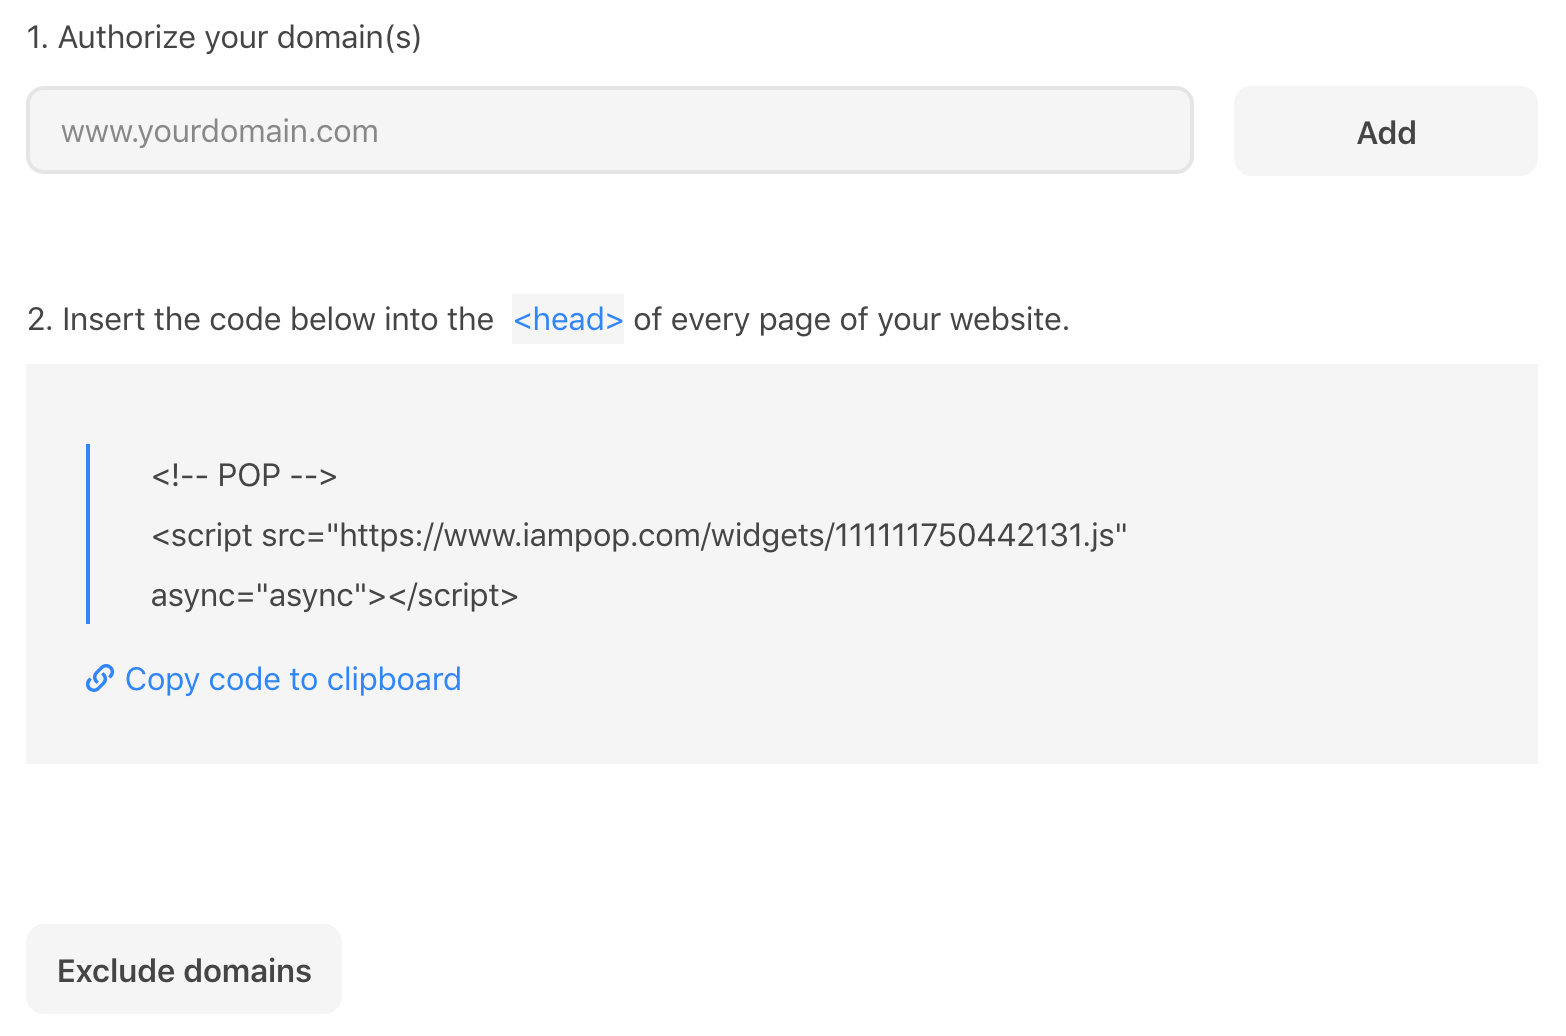
Alternatively, authorize your entire domain and exclude the pages you don’t want to add the widget to.
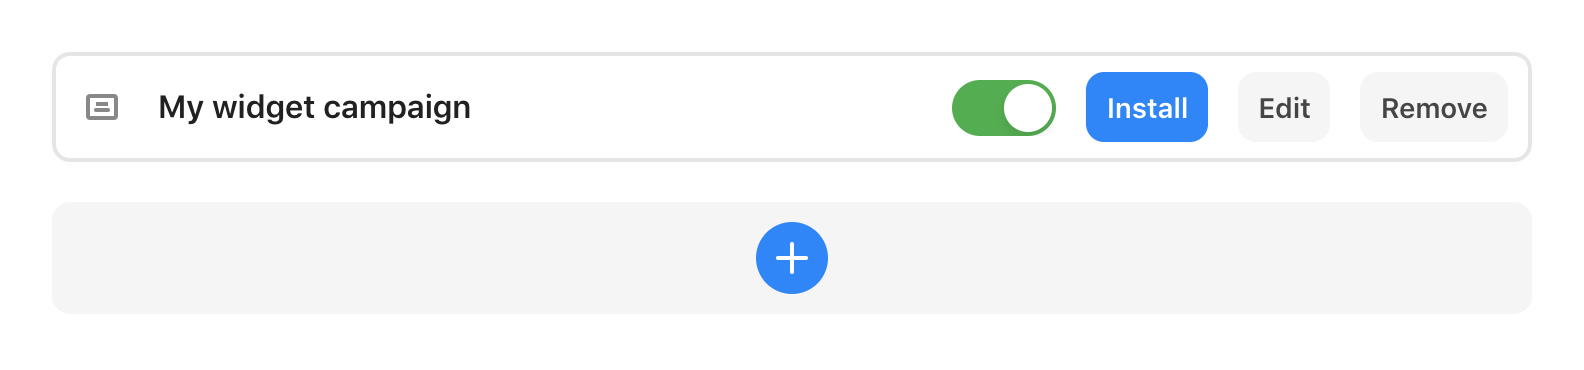
Once you’ve saved this step, your widget is live! You can toggle the widget on and off, or edit it once it’s live.
If you need any help with getting the tag on your website, please get in touch with us at hello@iampop.com.