Use Comment-to-Messenger to automatically respond with a Flow in Messenger when people comment on your Facebook posts.
Comment-to-Messenger is a powerful growth tool to drive traffic to Messenger, especially when it is combined with a paid post. Encourage people to comment on your post, and they will automatically receive a message in Messenger and (after 1 additional message or button press) are onboarded onto your Messenger channel.
Let's set up your first Comment-to-Messenger campaign!
1. Creating an engaging Facebook post
Because Comment-to-Messenger is all about getting comments on your posts, you need to make sure your posts reflect this clearly.
As usual with (Facebook) posts, add video and/or images to make it visually appealing.
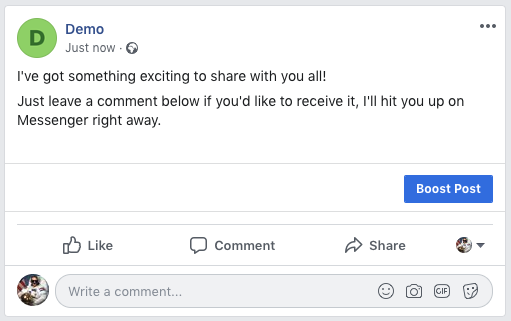
For demo purposes, this will be our Facebook post.
2. Create the Comment-to-Messenger rule
Head over to POP and navigate to the Tools tab of the Grow section. Here, you'll find all your active Comment-to-Messenger rules. Hit the big + and it should open a new screen with several options.
Give your Comment-to-Messenger rule a name and then select Specific post.
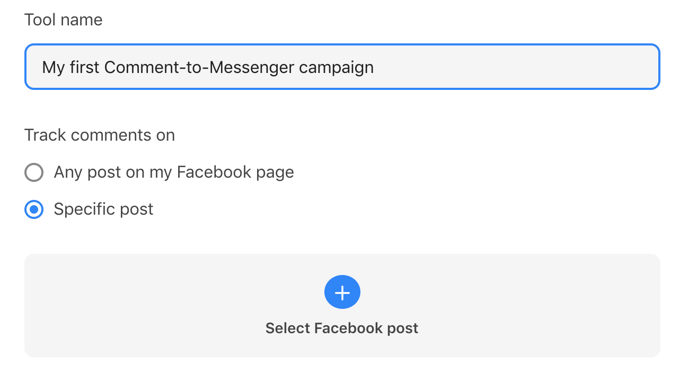
Next click on the 'Select Facebook post' button. This is where you can select which of your Facebook posts the rule will apply to.
You can select an already published Facebook post or one you scheduled for later.
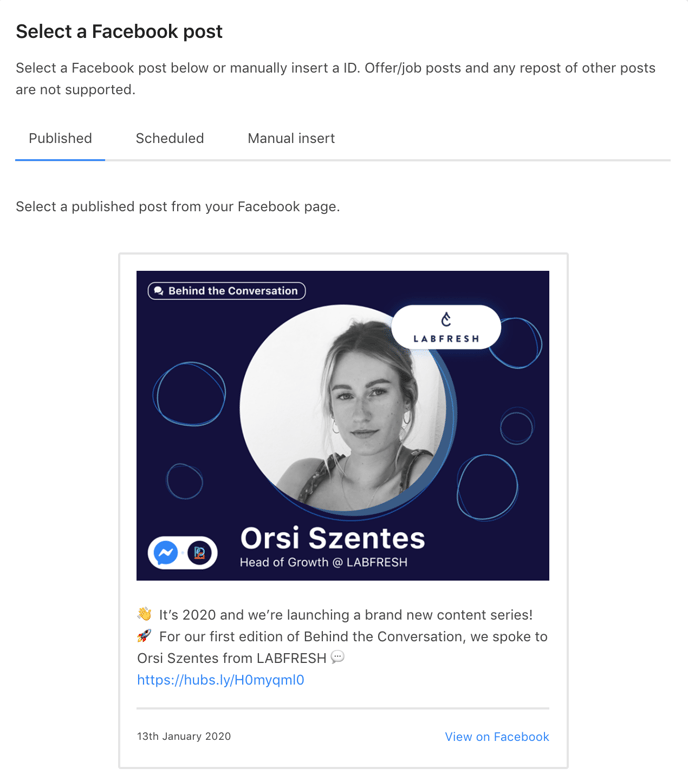
Choose a Facebook post, select it, scroll down the list and click on the blue 'Select' button. If you want to manually insert a post ID, read more about how to find this post ID.
Please note: if you selected 'Any post on my Facebook page' we only enable the functionality for Facebook posts that have been created after a connection with your Facebook page and POP has been live.
3. Who to send messages to
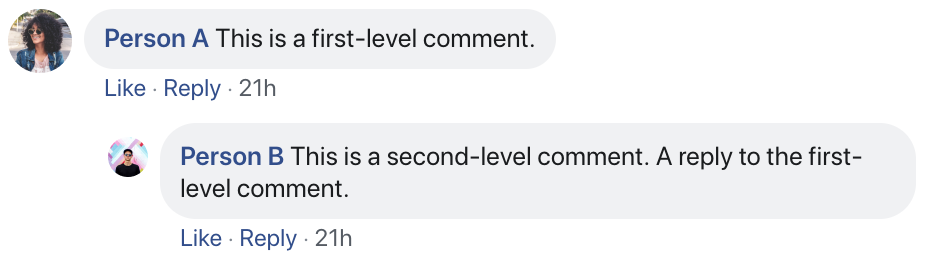
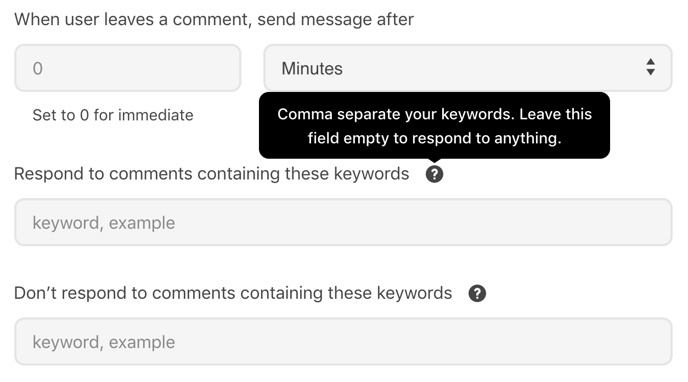
An important setting is the Respond to option. Check it if you want to avoid sending people replying to other comments a message.

Depending on what your post is about, it could be a good option to avoid sending messages to people replying to other people on your post. Additionally, use specific keywords that only trigger the comment to Messenger rule. But make sure your posts clearly state what your users should be typing.
4. Which keywords to respond to
You can set up your Comment-to-Messenger rule to respond to specific keywords in comments, or leave the field empty to respond to anything.
Make sure you align your Facebook post's copy to this, i.e. include a line like: "comment YES and we'll send you a private reply."
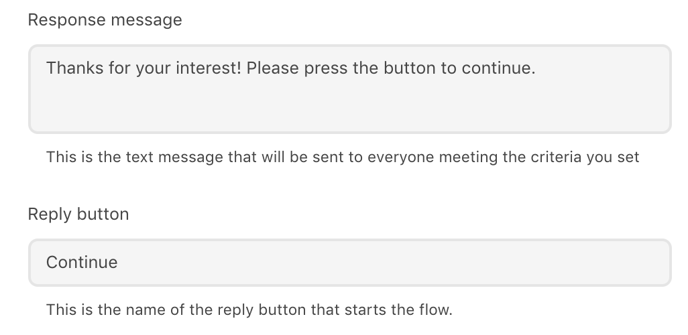
5. Your response message
Besides the fact that you can delay the response message, this initial message's goal is to spark interest in what you're offering and encourage people to interact with your bot.
Make sure to amend the default copy to match your post's offering in case necessary:
6. After the response message
Now we can create a Flow that will send after people click the reply button.
The easiest option is to select Send a Flow and hit Create Flow to get a blank canvas.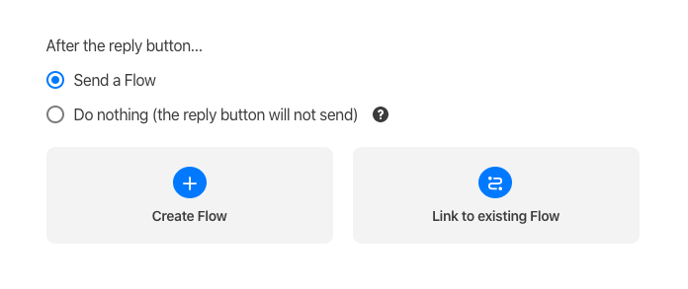
Next, hit Open on the newly created Flow and write your messages.
7. Test your Comment-to-Messenger rule
Click submit at the bottom of the page and you've successfully set up your Comment-to-Messenger rule.
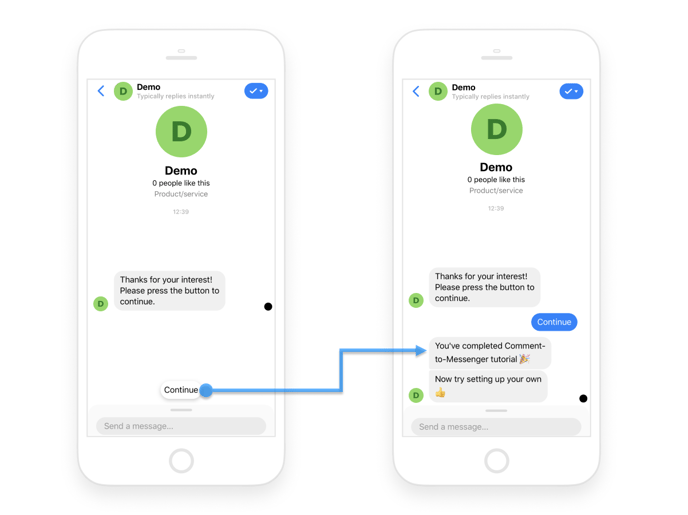
Head back to your Facebook post and give it a try. After commenting on the post, you will receive the response message set up in step 5.
Click the reply button, to trigger the flow you created in step 6.
Thanks for following along with this tutorial. Don't hesitate to send us your feedback or questions to hello@iampop.com.
Looking for some inspiration on how to implement this feature in your Messenger Marketing strategies? Check out this Case Study on our blog.
Here's a tutorial video on setting up a Comment-to-Messenger campaign from start to finish: