You can send direct messages to people outside the 24 hour interaction window by using Sponsored Messages in the Facebook Ads Manager. This allows you to reengage an audience that has gone cold or send promotional material when otherwise disallowed.
TL:DR check out this tutorial video on how to set up a Sponsored Message
Why use Facebook Sponsored Messages
Facebook identifies that Sponsored Messages are best used to achieve the following goals:
-
Nurture existing relationships by sending relevant offers, updates and other promotional content
-
Reengage customers where they left off in conversation with your bot
-
Direct existing customers to a specific feature or product within your bot
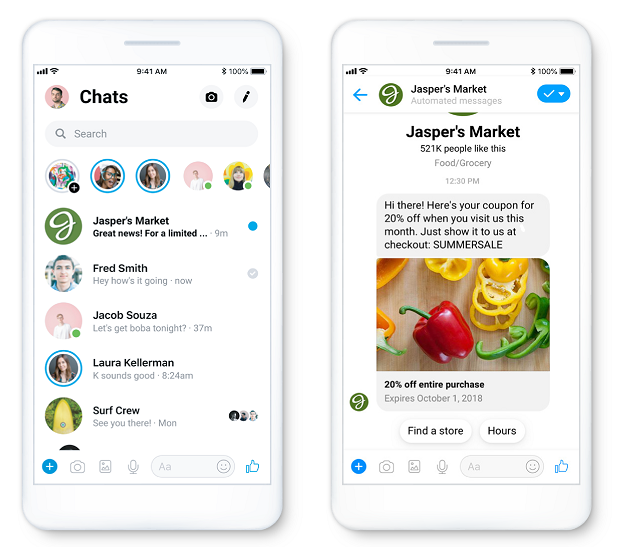
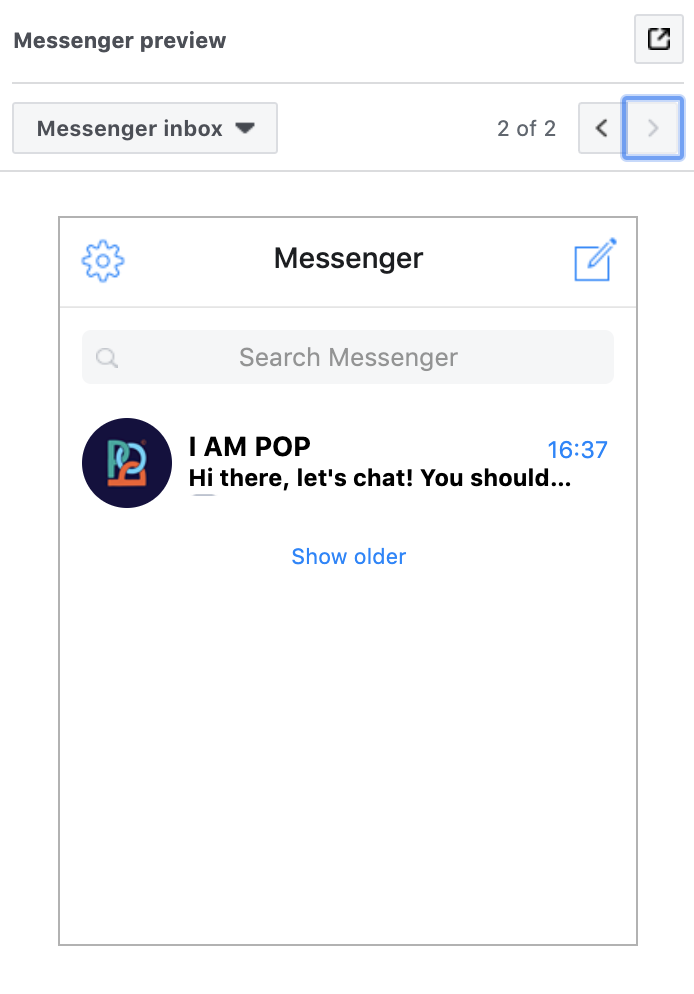
This is what a Sponsored Message looks like in the Messenger inbox. This ad type is billed on an impression basis. This means your ad account is charged for an impression when someone sees they have a message from your business in their Messenger Inbox.
The minimum bid to receive sponsored message delivery varies by country. In the US, the recommended bid is USD 30 per 1,000 impressions.
This means that, in the US, an indication of the average cost of Sponsored Messaging is about USD 0,03 per delivered message.
Note: a delivered message, viewed in the inbox, doesn't mean people will also open the message. It's up to you to create great copy that persuades users to open your Sponsored Message and to target people that are already likely to engage with your business.
Example use case
You ran a Messenger campaign and shared a flow that gave users a discount code if they left their email address.
Now, you want to retarget the users that didn't share their email address and didn't receive the discount code.
You can export and create a Custom Audience made up of all users that haven't shared their email address with you, and send them all a Sponsored Message with another flow. This means you get a second chance at conversion!
How to set up a Sponsored Message with POP
Setting up a Sponsored Message is done through the Facebook Ads Manager. Go to the Ads Manager, log in, and select the correct ad account to get started.
Step 1: Choose the Sponsored Messages ad type
- Start by clicking on Create ad.
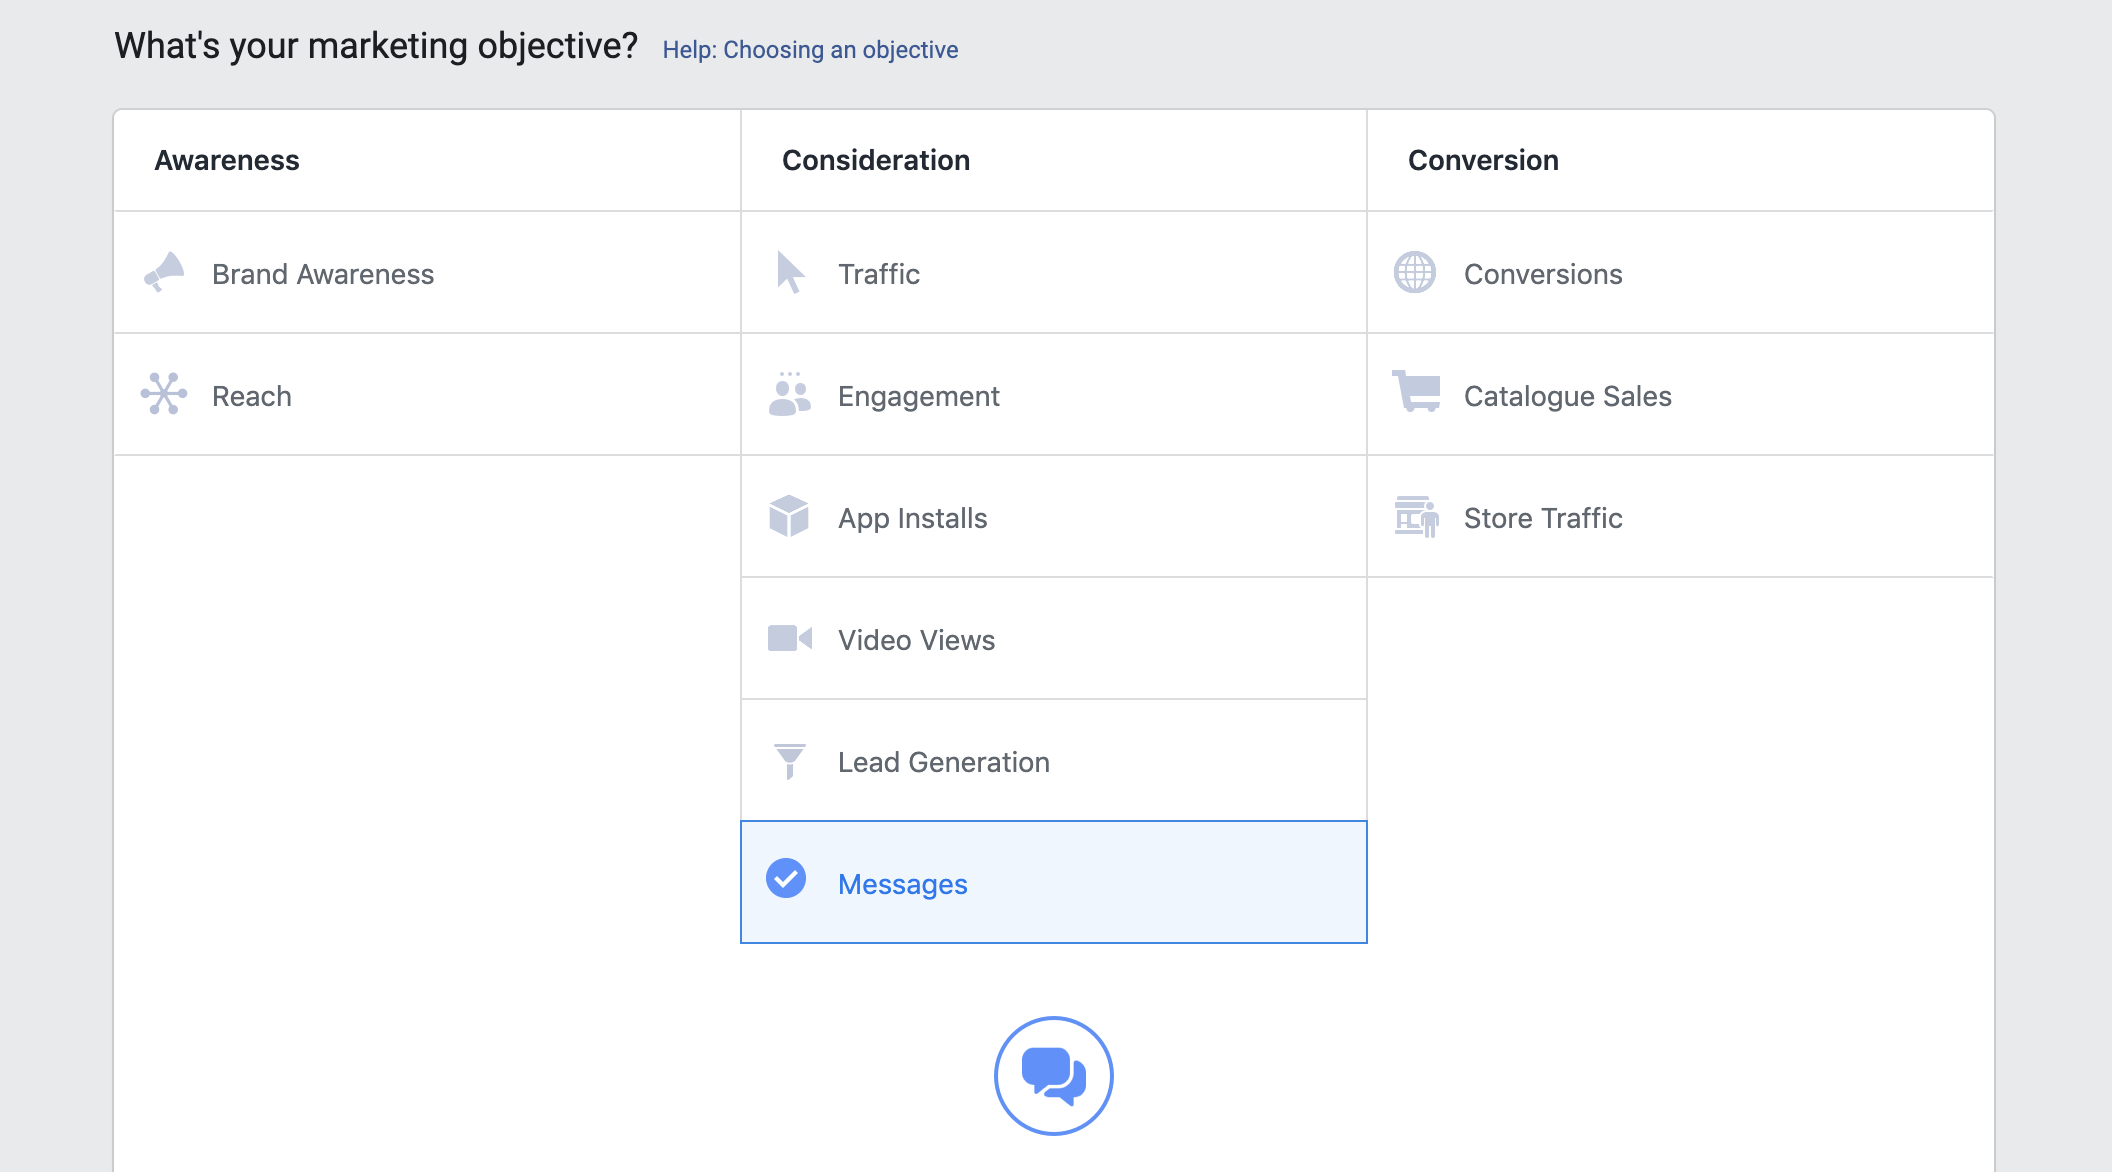
- Under the Consideration column, choose the Messages objective.
- Create a campaign name and click Continue.
- Under Message destination, choose Messenger.
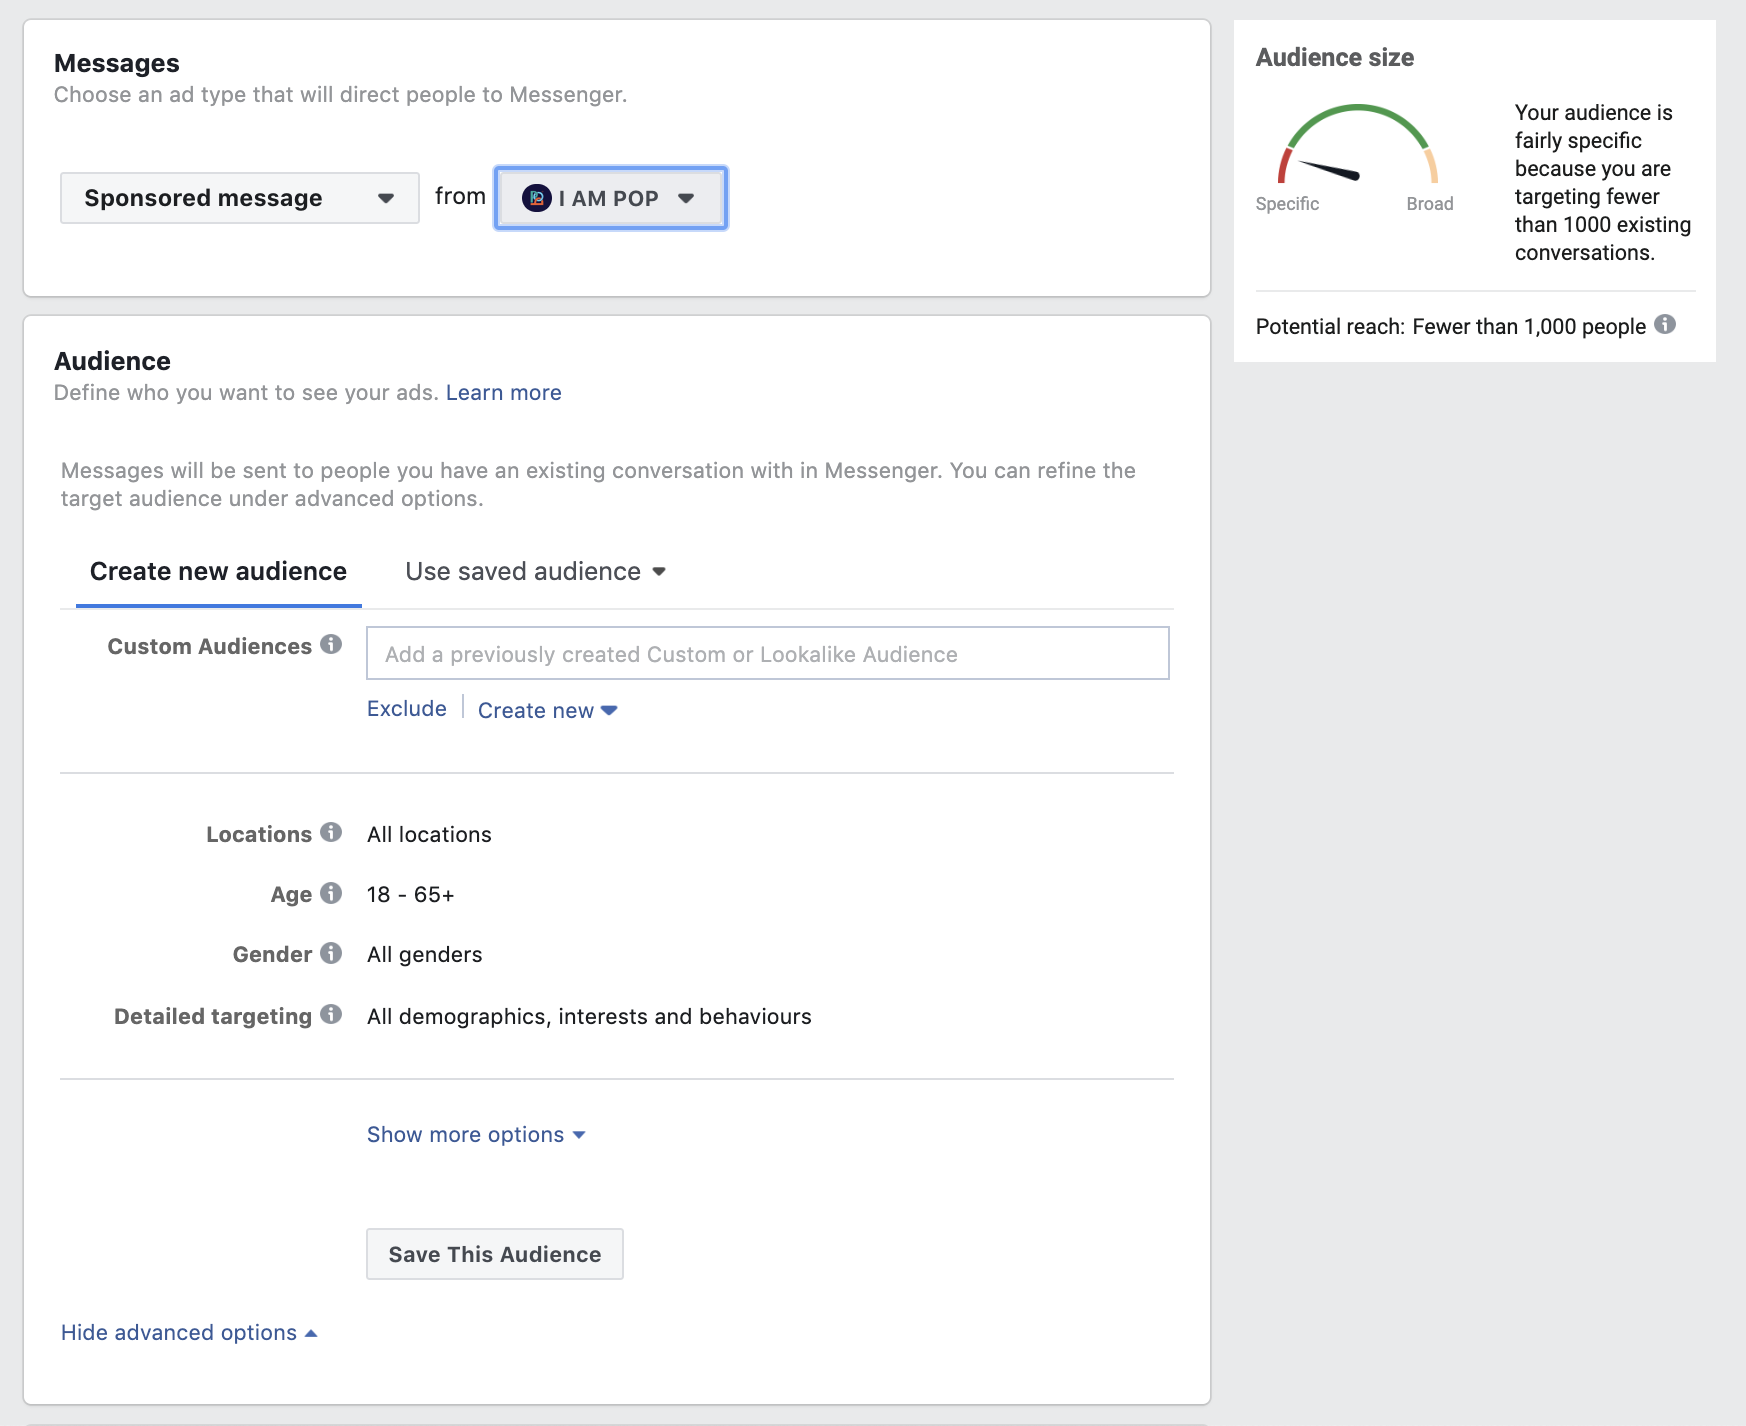
- Use the drop-down menu under Messenger to select Sponsored messages, then choose the correct Page.
Step 2: Choose your audience and budget
The standard audience selected for Sponsored Messages is people you have an existing conversation with in Messenger.
You can refine this audience by creating a new audience, as long as the people in this audience also have an existing conversation with you in Messenger (i.e. any of your POP audience members).
If you're looking to reach a specific subset of your audience, simply choose the desired filters in Audience > Statistics, and export the subset.
Read more about creating Facebook Custom Audiences using data from your POP audience.
You won't need to select placements because a Sponsored Message can only appear in the Facebook Messenger inbox.
Next, select your budget and schedule.
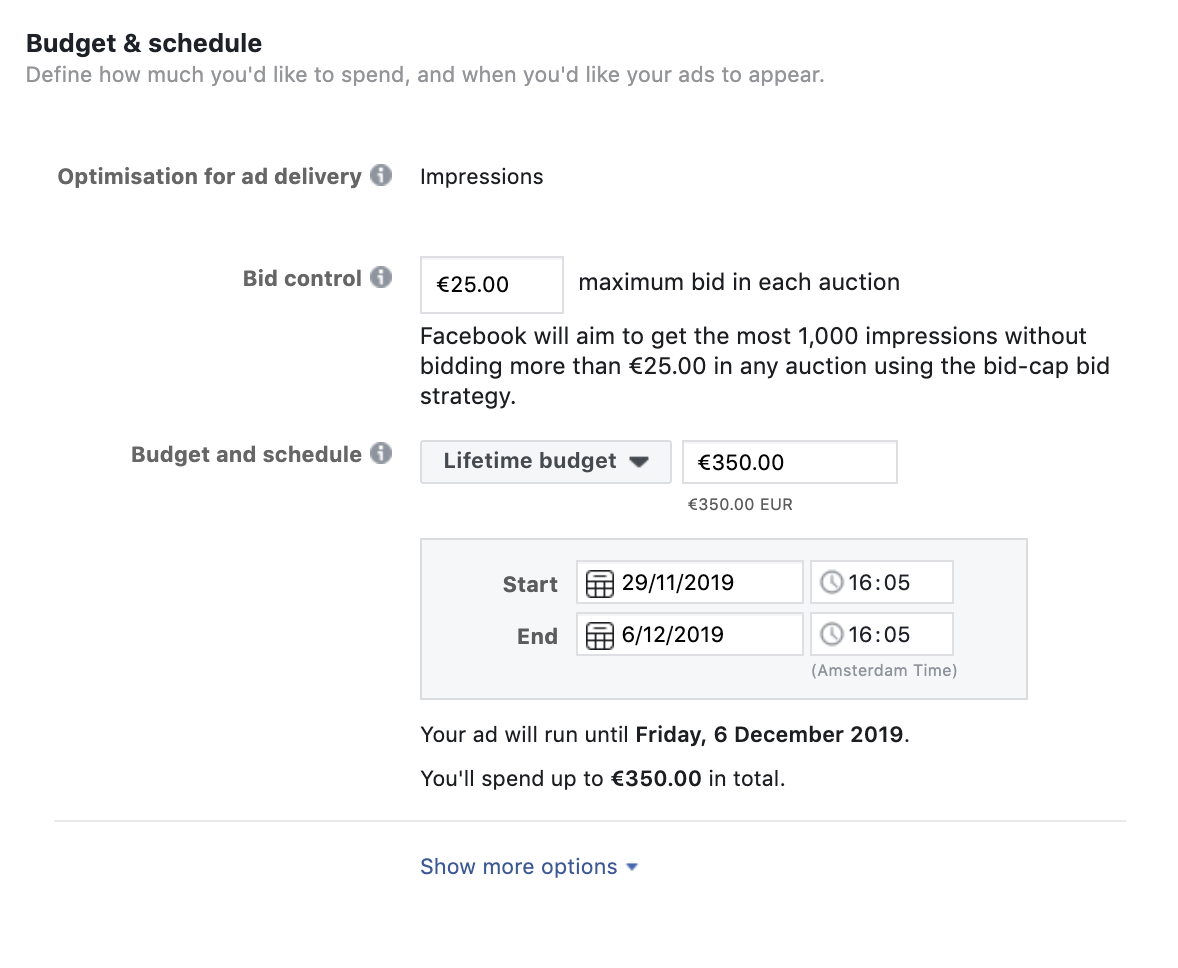
There are minimum bids for Sponsored Message ad campaigns that differ per country. You can find the numbers by following this link.
When you've set your budget and schedule, click 'Continue' and you're ready to start creating the actual message.
Step 3: Set up your initial message
First up, you will need to write up some copy for the initial message that will appear in people's inboxes. This will also show up as a push notification on mobile phones, of course.
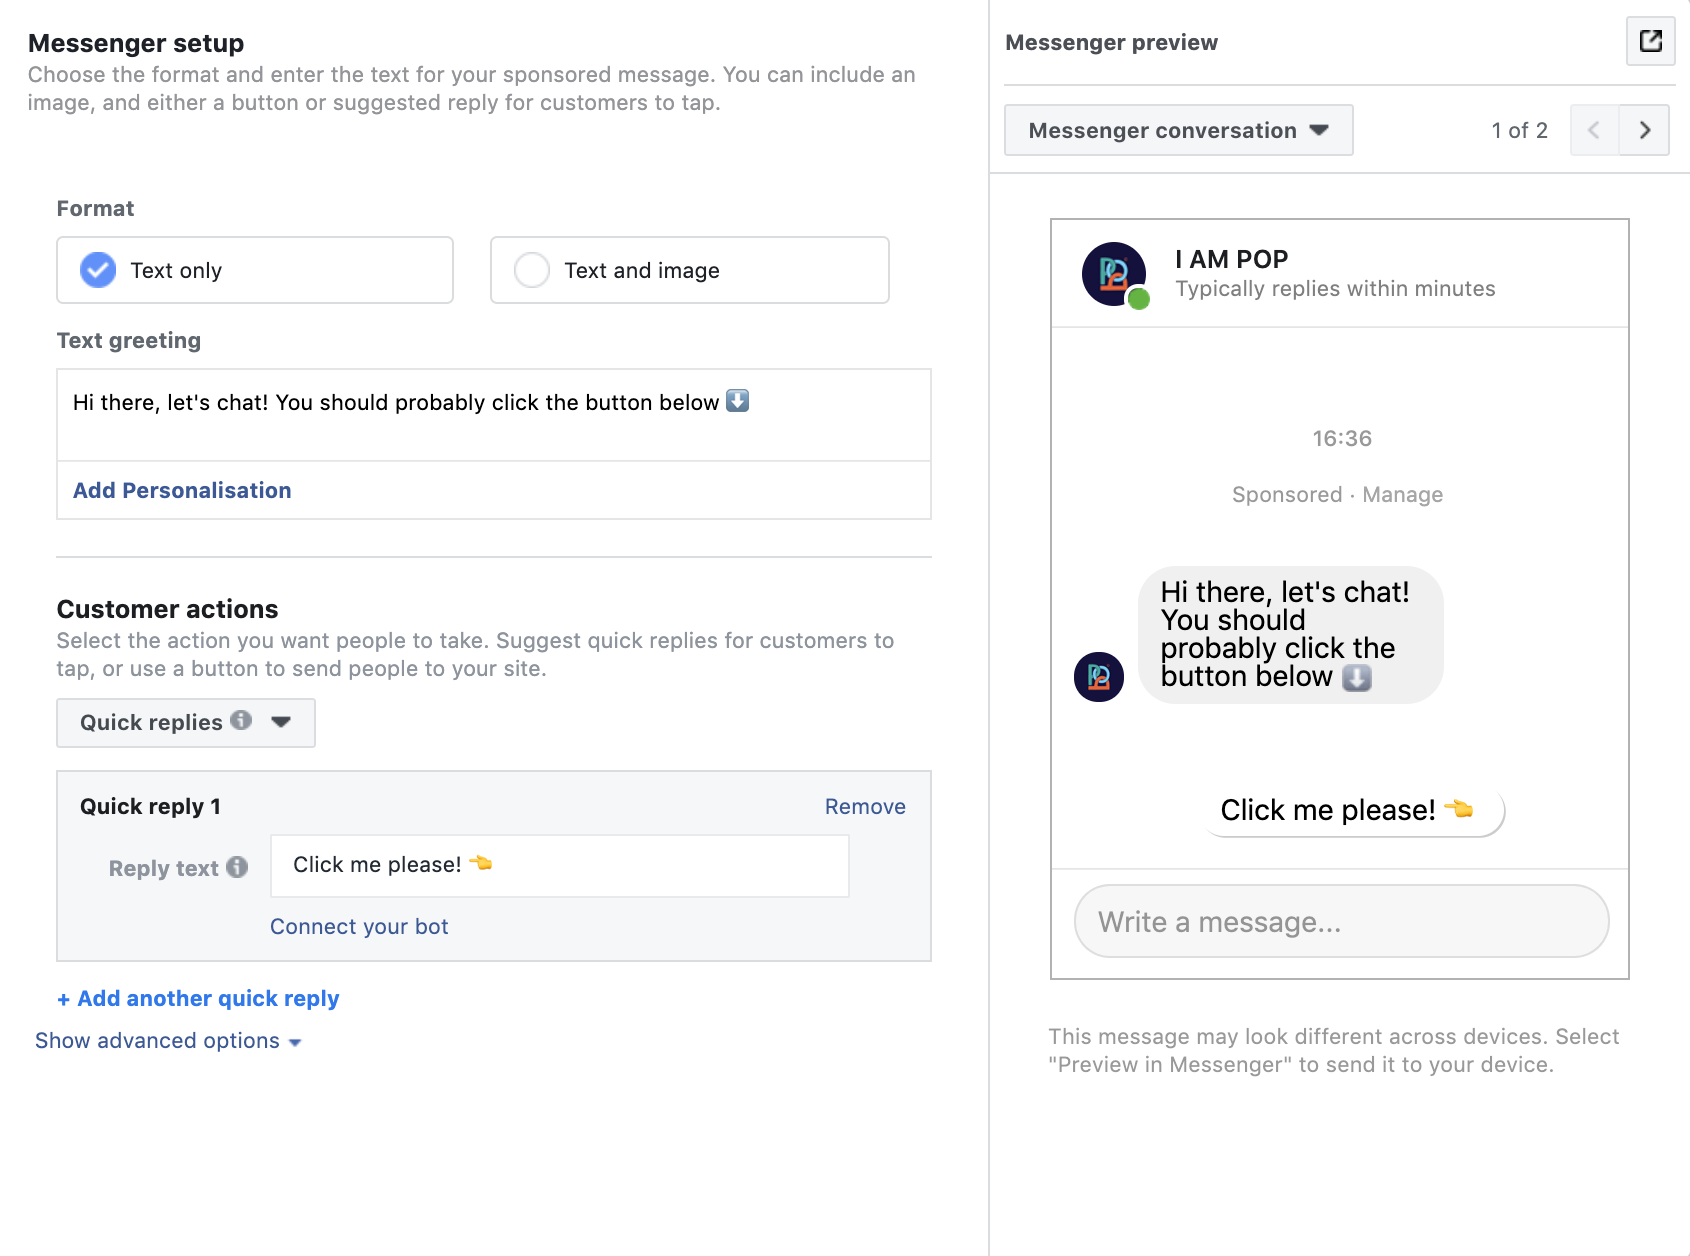
In the relatively limited Facebook Ads Manager, you can select text, text and image, and preempt a customer action with a Quick Reply or a button.
This is just an initial message, as we're going to connect your POP bot to the Quick Reply or button. Make sure the copy in your initial message incentivizes people to click the button, and come up with a strong CTA on the button itself.
You can preview what the message looks like in the inbox, as well. This is very important, since there is a cut-off in the inbox, so people won't see the entire message.
Check this preview and adjust the copy accordingly, to make sure it's an inviting message to open!
When people open it, read it, and are enticed to click the button, your chatbot can take over. But first, we'll have to...
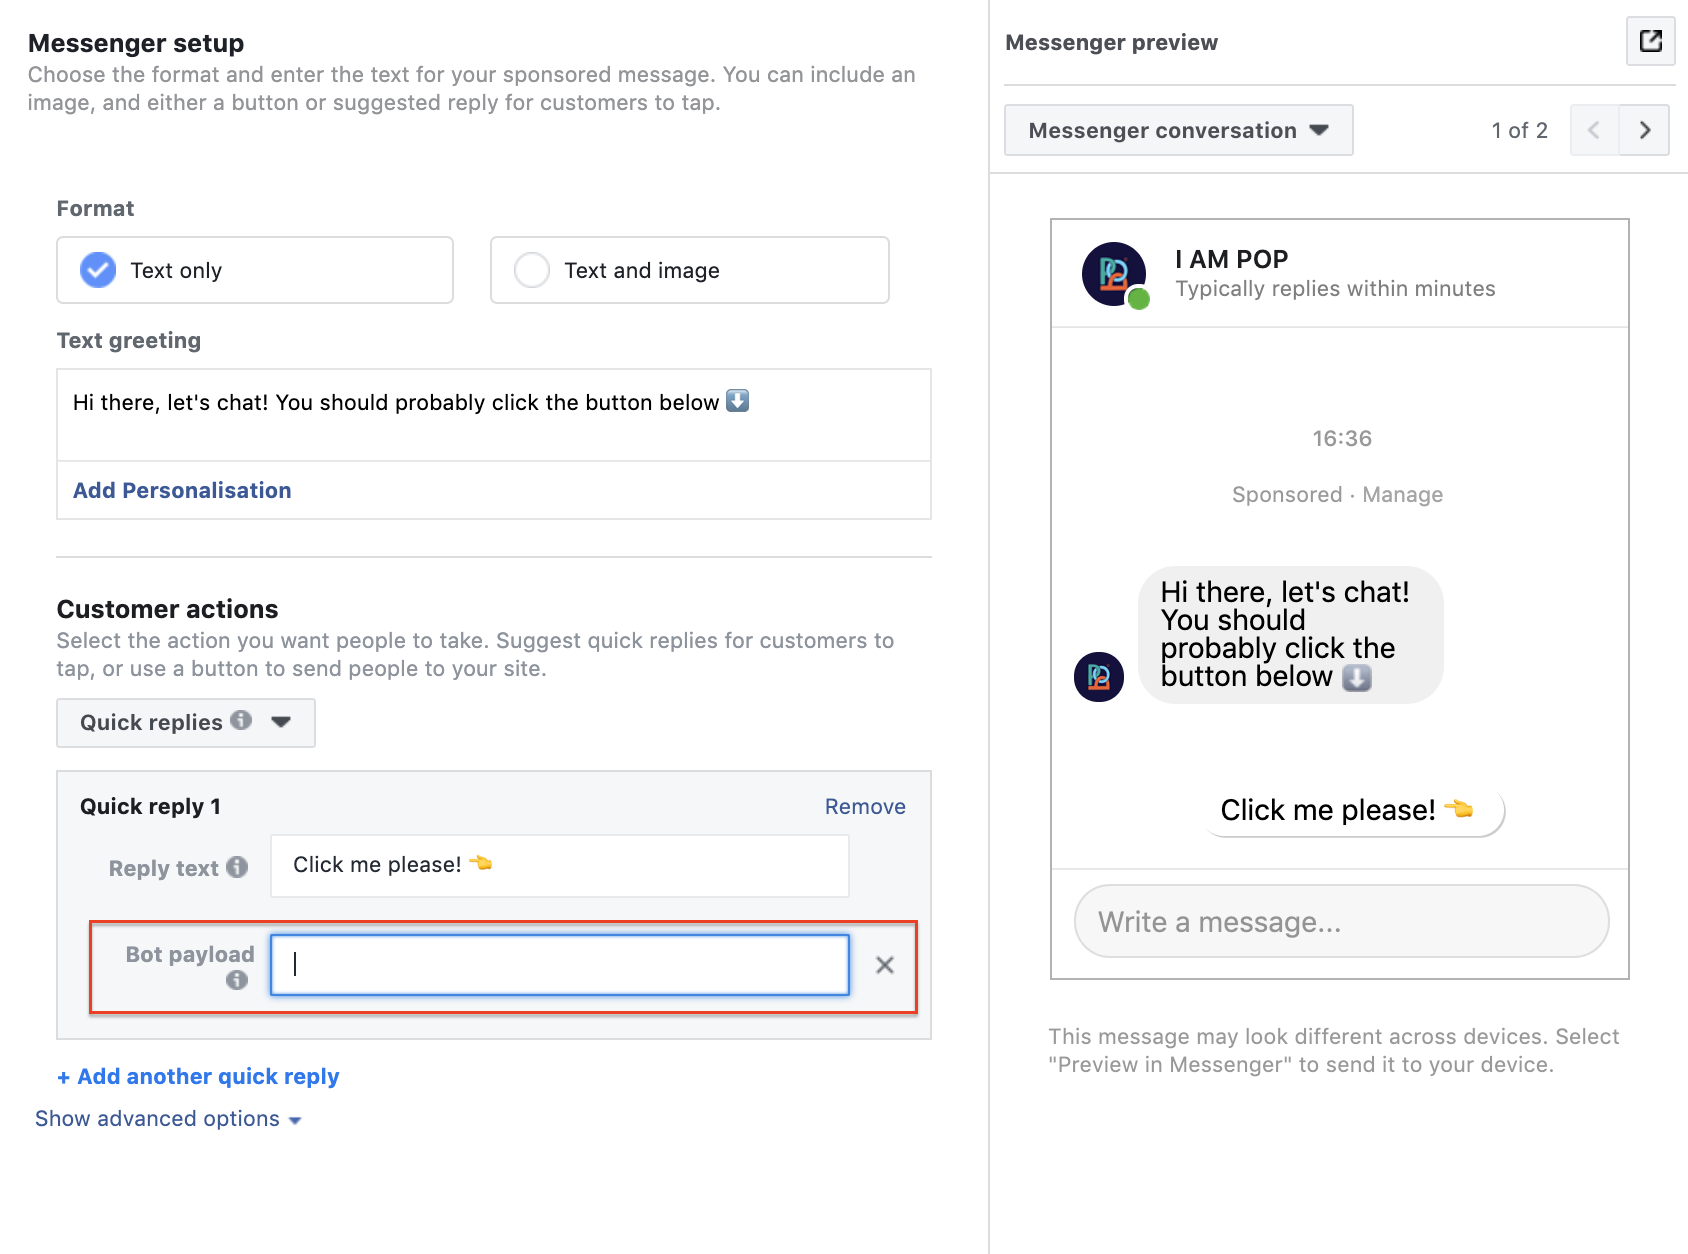
Step 4: Connect your POP bot
To connect your POP bot to the button in your Sponsored Message, click on 'Connect your bot' directly below where you write the text for the Quick Reply or button.
Note: you can set up to 11 Quick Replies or buttons, each of which can be connected to a separate POP flow. This allows you to already give people plenty of options at their first touchpoint.
When you click on 'Connect your bot' a field for a bot payload will appear:
This payload can be retrieved from a flow that's open in the POP Chat Editor. Just click on the ellipses in the top-right corner of the Chat Editor when you open a saved flow, and select 'Get payload'.
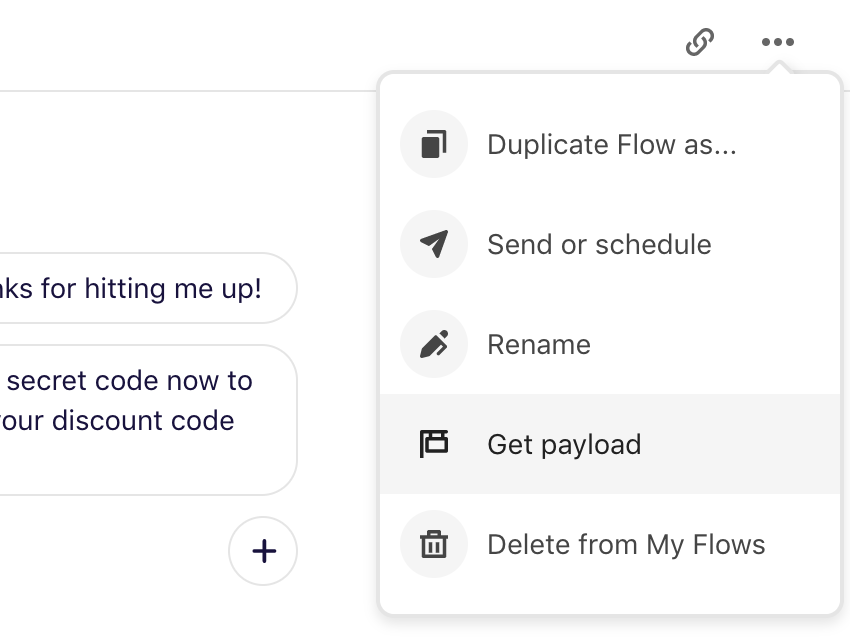
This will open a modal with the flow payload, which you will need to paste in the Facebook Ads Manager to connect your flow.
When this is done, click on 'Confirm' and your Sponsored Message will be submitted for review!