You can use your Messenger channel's audience to create a Custom Audience in Facebook Ads Manager. Export your audience and import it in the Ads Manager to run better ad campaigns.
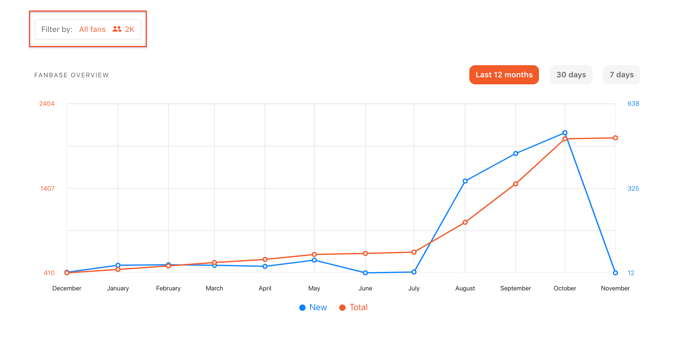
Once you've gathered a Facebook Messenger audience using POP, you can view it in the Audience > Statistics tab of your dashboard. You can filter your audience according to any channels or segments users are in, as well as their fan data or location. This allows you to create and export a list of your Messenger subscribers to use for retargeting.
Facebook Custom Audiences
A Custom Audience is an ad targeting option that lets you find your existing audiences among people who are on Facebook.
You can use sources such as customer lists, website or app traffic, or engagement on Facebook, to create Custom Audiences of people who already know your business.
In your case, you will want to use an exported Messenger audience from your POP account and upload it as a customer list.
Step 1: Selecting an audience
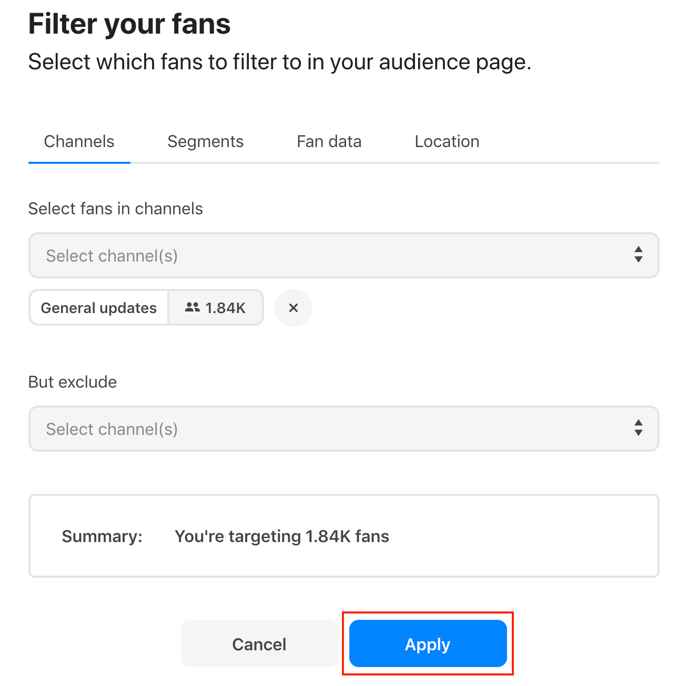
You can export your entire Messenger audience, or filter it according to your needs. To filter your audience, click on the ‘Filter by’ option in the Statistics tab:
Select any filters you deem necessary to your targeting purposes and click on ‘Apply’ to set these filters. You’ll be shown how many fans this filtered audience contains in the ‘Summary’ box:
Step 2: Exporting an audience
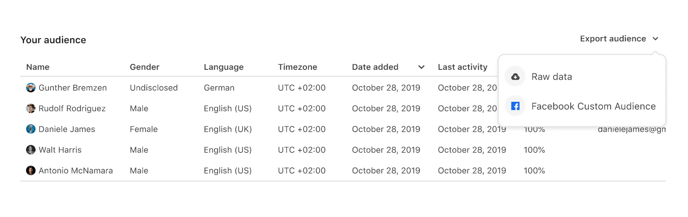
After having applied the necessary filters, scroll down to the audience table, where you will see a list of names of the subscribers in your selected audience.
Click on ‘Export audience’ in the top-right of this section. You will be able to choose exporting all raw data - the entire data set for this audience - or a Facebook Custom Audience.
The Facebook Custom Audience data set is an amended data set that works seamlessly as an import in Facebook Ads Manager.
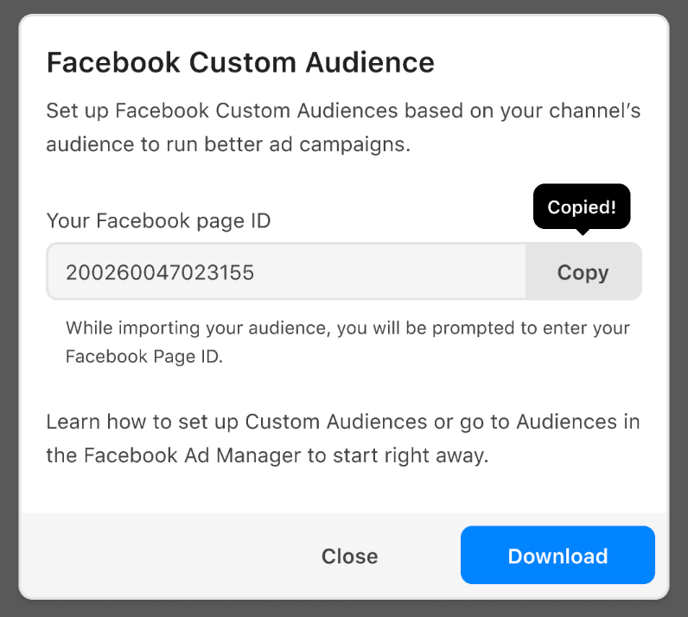
Selecting the Facebook Custom Audience option will open up the following modal window. Here, your Facebook page ID is displayed.
Copy this to your clipboard, since you will need to enter this page ID in the Facebook Ads Manager. Click the ‘Download’ button to download your audience sheet.
Step 3: Uploading your audience in Facebook Ads Manager
Next up, you’ll want to go to Facebook Ads Manager itself. Note: don’t forget to select your Facebook Business Page account instead of your personal ad account.
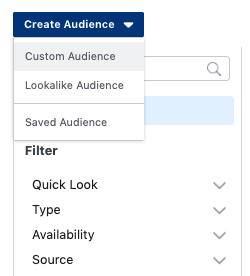
Create a new Custom Audience and, when prompted, select ‘Customer list’ > ‘Use a file that doesn’t include LTV’ as a source for this audience.
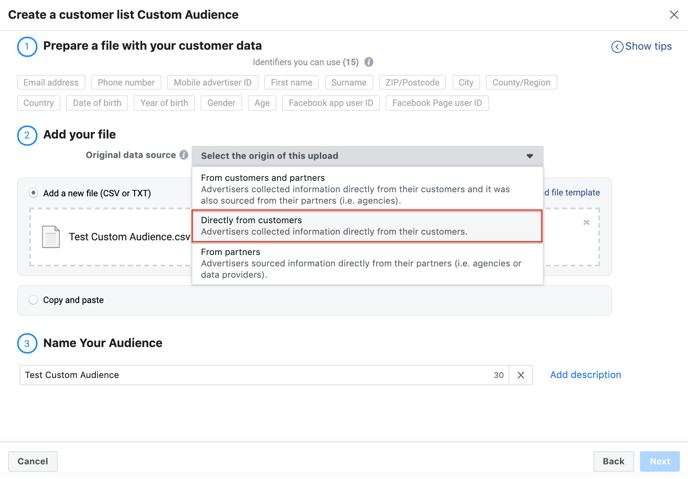
Add the sheet with your Facebook user data and select the origin of this upload to be ‘Directly from customers’.
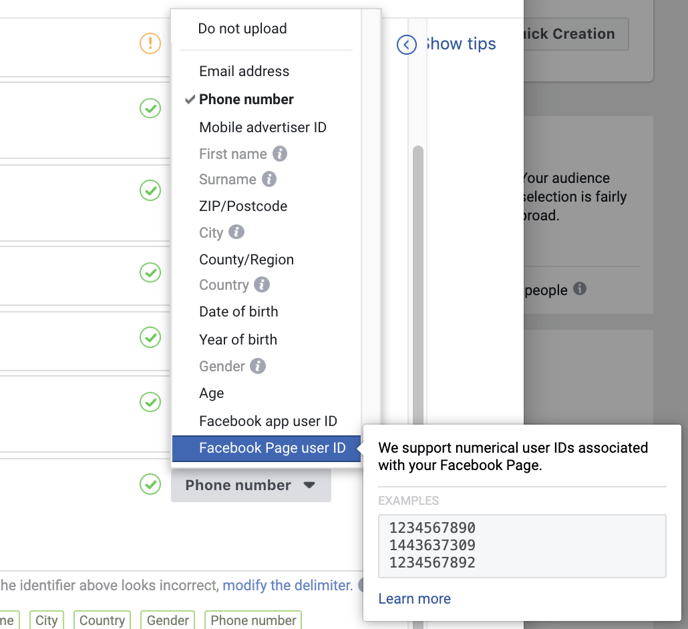
Click on ‘Next’ and you will be asked to preview and map your data. If you selected the ‘Facebook Custom Audience’ option when exporting your POP audience, the customer data will include Facebook Page user IDs.
Facebook Ads Manager automatically maps these as phone numbers. From the dropdown menu, select ‘Facebook Page user ID’ instead.
Your final step is to enter your Facebook page ID, so that Facebook Ads Manager can make sure that these users actually came from your Messenger channel.

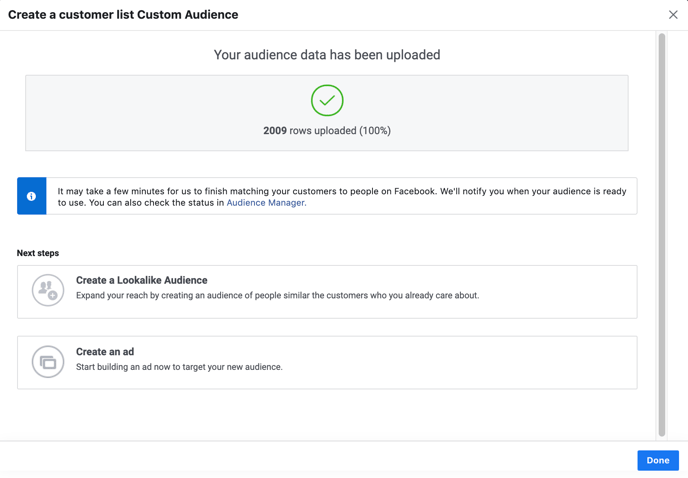
Click on ‘Enter Facebook Page IDs’ and enter the code you copied earlier from the modal window in your I AM POP dashboard. Input the ID, click the ‘Add’ button. Finally, click on the ‘Upload & Create’ button to create your Custom Audience.
Target this audience when creating a Facebook Ad, for instance, with a Click-to-Messenger ad or a Sponsored Message.
Or use this Custom Audience to create a Lookalike Audience to expand your reach to people similar to your Messenger subscribers.