As of July 31, 2019, Facebook Subscription Messaging permissions will be granted at Page-level. This means you will have to apply for these permissions. Here is a step-by-step guide on how to do this.
Update September 2019:
Please note that the this article is out-of-date as of September 2019. Please refer to our most recent article on Facebook's Messenger policies for a summary of the current situation.
A Quick Explanation
There are three types of messaging available through Facebook Messenger and I AM POP:
- Standard Messaging: (non-)promotional content within 24 hours after a user interacts with your channel + 1 more promotional message outside this 24-hour window
- Subscription Messaging: no advertising, marketing, or promotional content allowed, but you can send content whenever you want
- Sponsored Messaging: paid advertisement messaging for promotional messages outside of the 24-hour window to people who have interacted with your channel before
To be eligible for Subscription Messaging, you need to apply for permissions. Basically, Facebook doesn't want you to bombard people with promotional content whenever you want.
You are allowed to inform people about important recent news or events, or provide information in certain categories, as much as you want.
You just have to apply for Subscription Messaging permissions, by explaining what type of messages you will be sending.
Be aware: when approved, you will need to adhere to Facebook's policy. The company will use machine learning to check whether messages tagged as Subscription Messaging are non-promotional in nature. Make sure all of your Subscription Messaging provide information instead of being advertising.
The Application Process
The application process is reviewed by people, manually, so make sure you explain exactly what you are going to use Subscription Messaging for, and how it isn't advertising or promotional.
The manual review also means that it might take a few times before you are accepted. Some of our clients were approved in one go, while others have had to amend and adjust their application messages a few times before they got approval.
If your application happens to be rejected, just try again and rephrase your application with Facebook's policy in mind.
Here's a walkthrough video which shows the application process step-by-step.
Facebook Subscription Messaging
Facebook Subscription Messaging allows you to send informational, non-promotional content to subscribers whenever you want.
If you want to send promotional material, this is no problem, and can be done through Standard Messaging, but limited to people that have interacted with your channel in the last 24 hours (+1 more promotional message after that).
There are detailed instructions below, but in order to make sure you've done everything you need to do, keep the following checklist in mind:
- Request subscription messaging in Facebook Page settings.
- Pick a category from news, productivity or personal tracking.
- Describe the kind of subscription messages you’ll send in a short answer form.
- Give 2 or more examples of subscription messages you would send.
- Take a screenshot of the application so you can share and review it for feedback if needed later.
- Check the box that acknowledges you won’t use subscription messaging to send advertisements or promotional messages and will follow Facebook community standards.
- Click “Save Draft”.
- Consider if you want to allow business applications like I AM POP to access specific info about your contacts. In order to send scheduled messages by time zone, or create audiences based on language and gender, you need to do these steps.
- Click the button to submit the subscription messaging application for review.
- Check back in a few days. Facebook says to expect 5 business days.
How to apply for Facebook Subscription Messaging
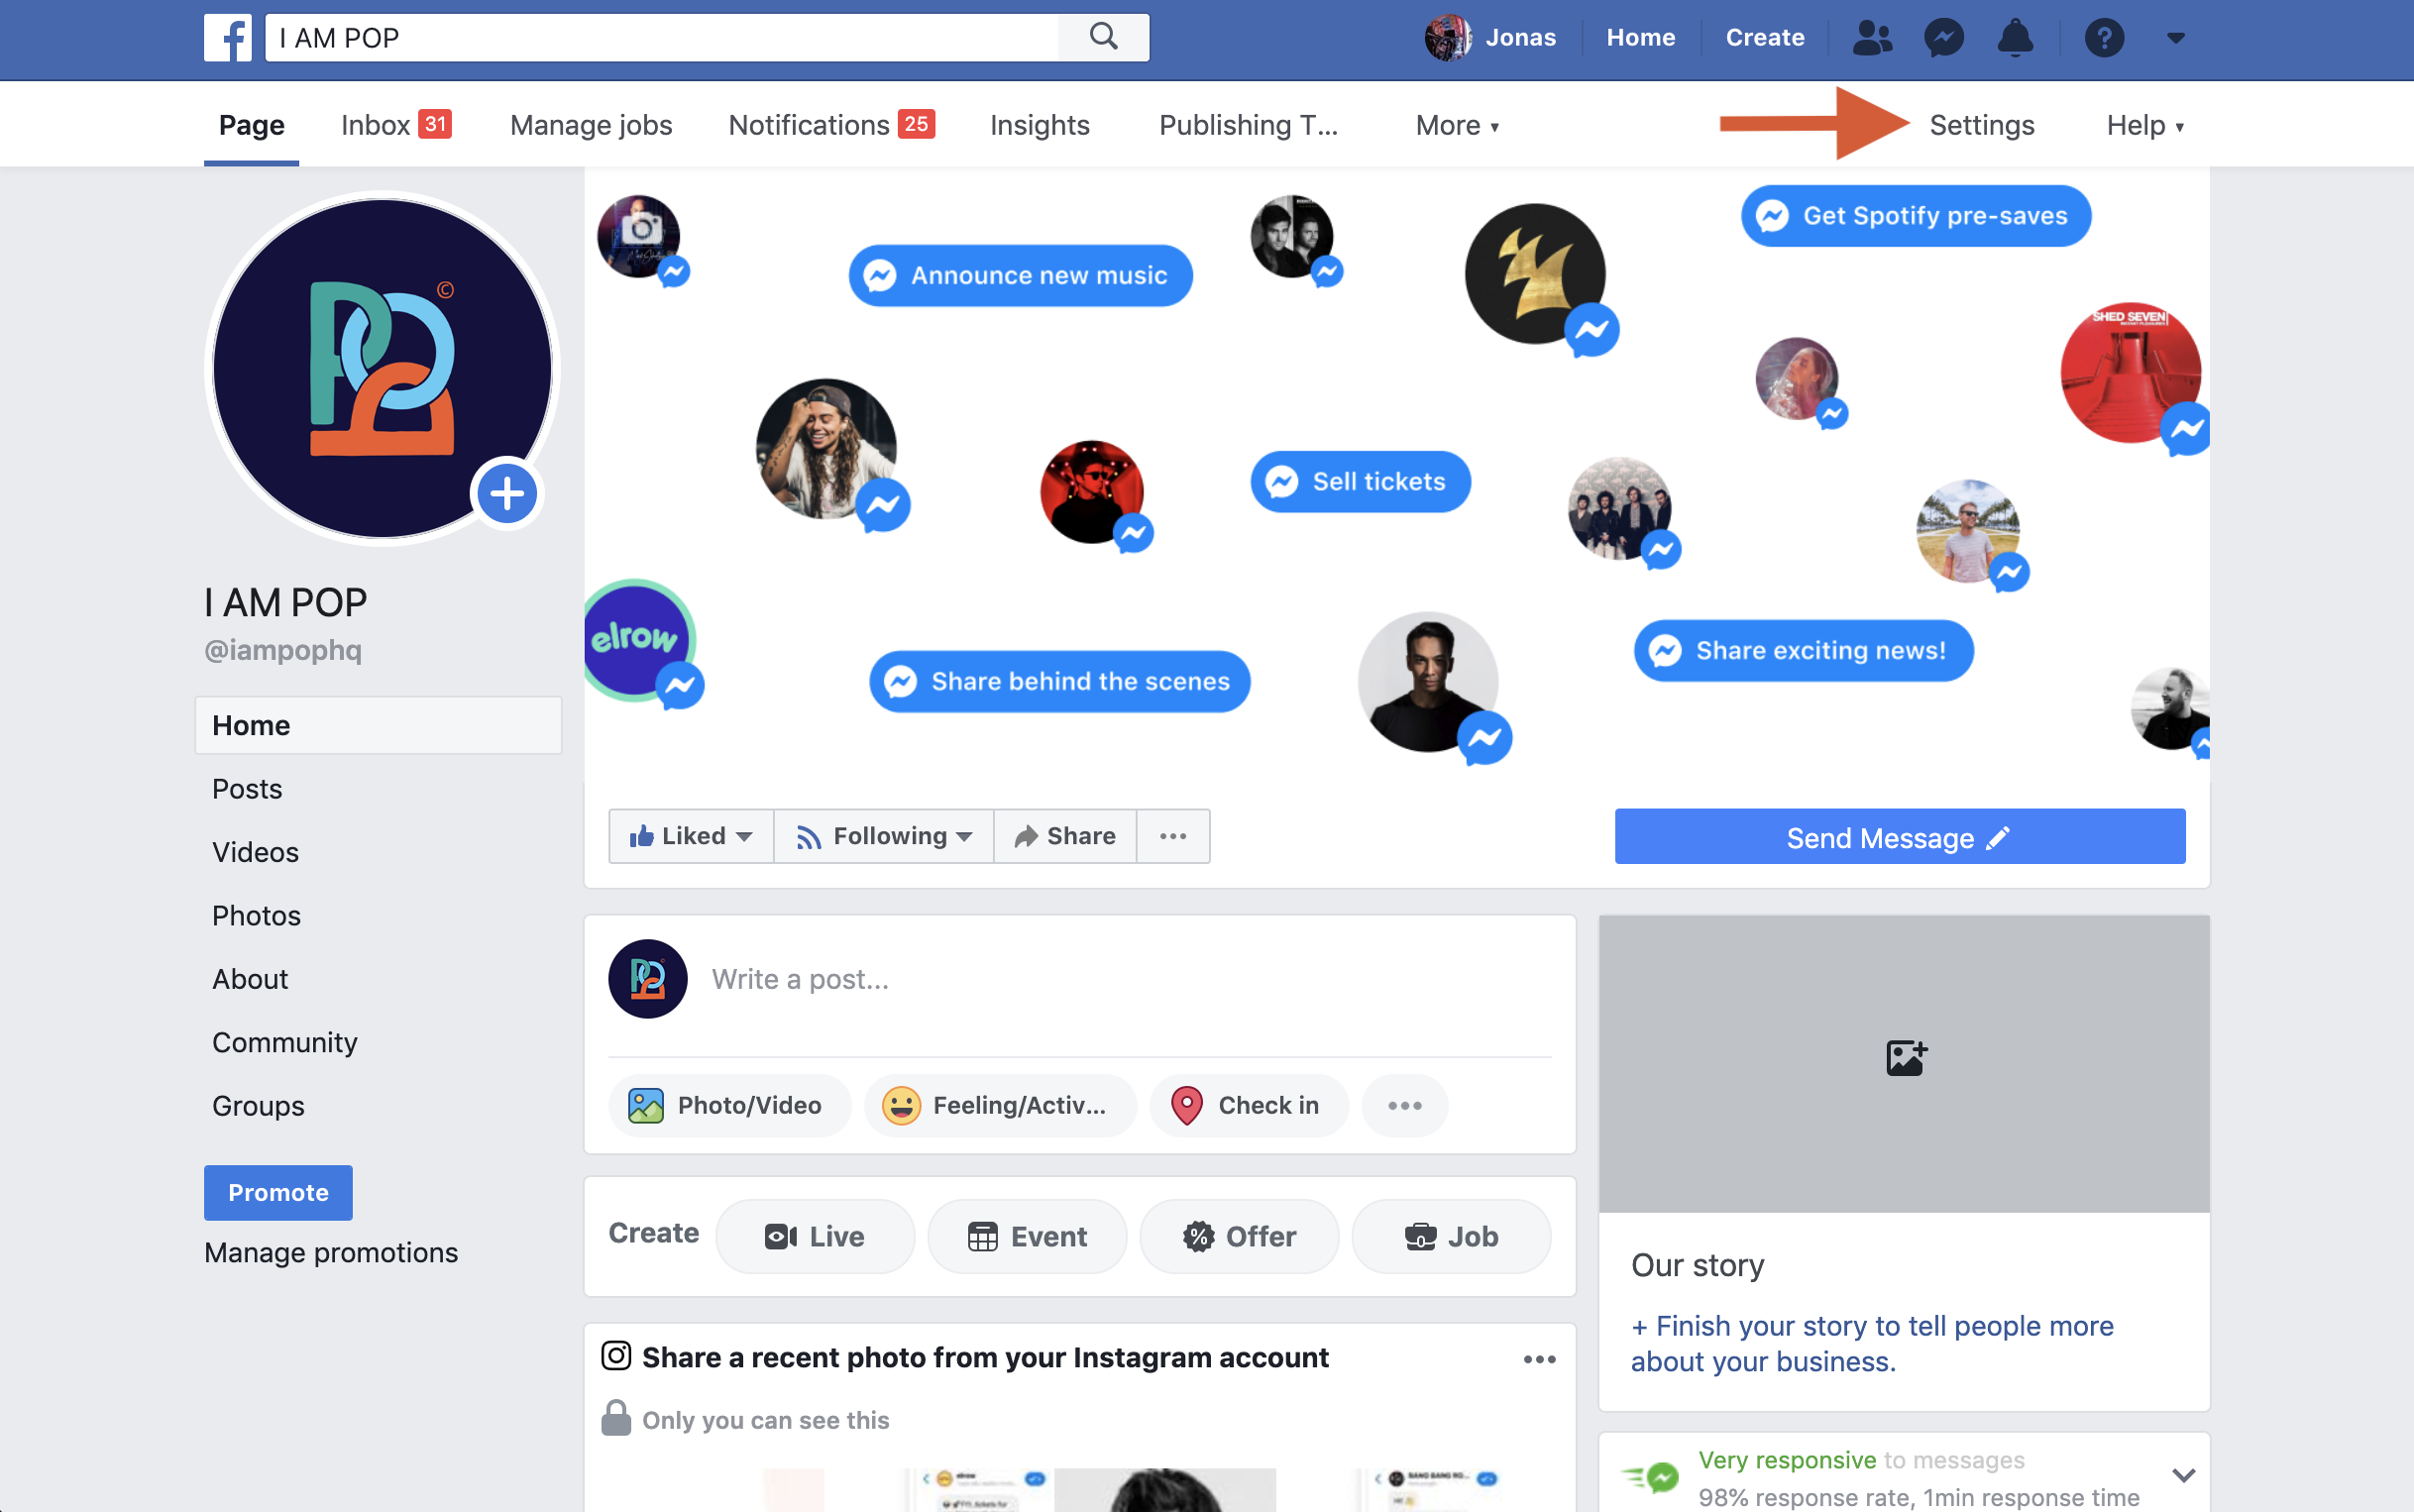
To apply for Subscription Messaging, you will have to go to the settings of your Facebook Business Page:
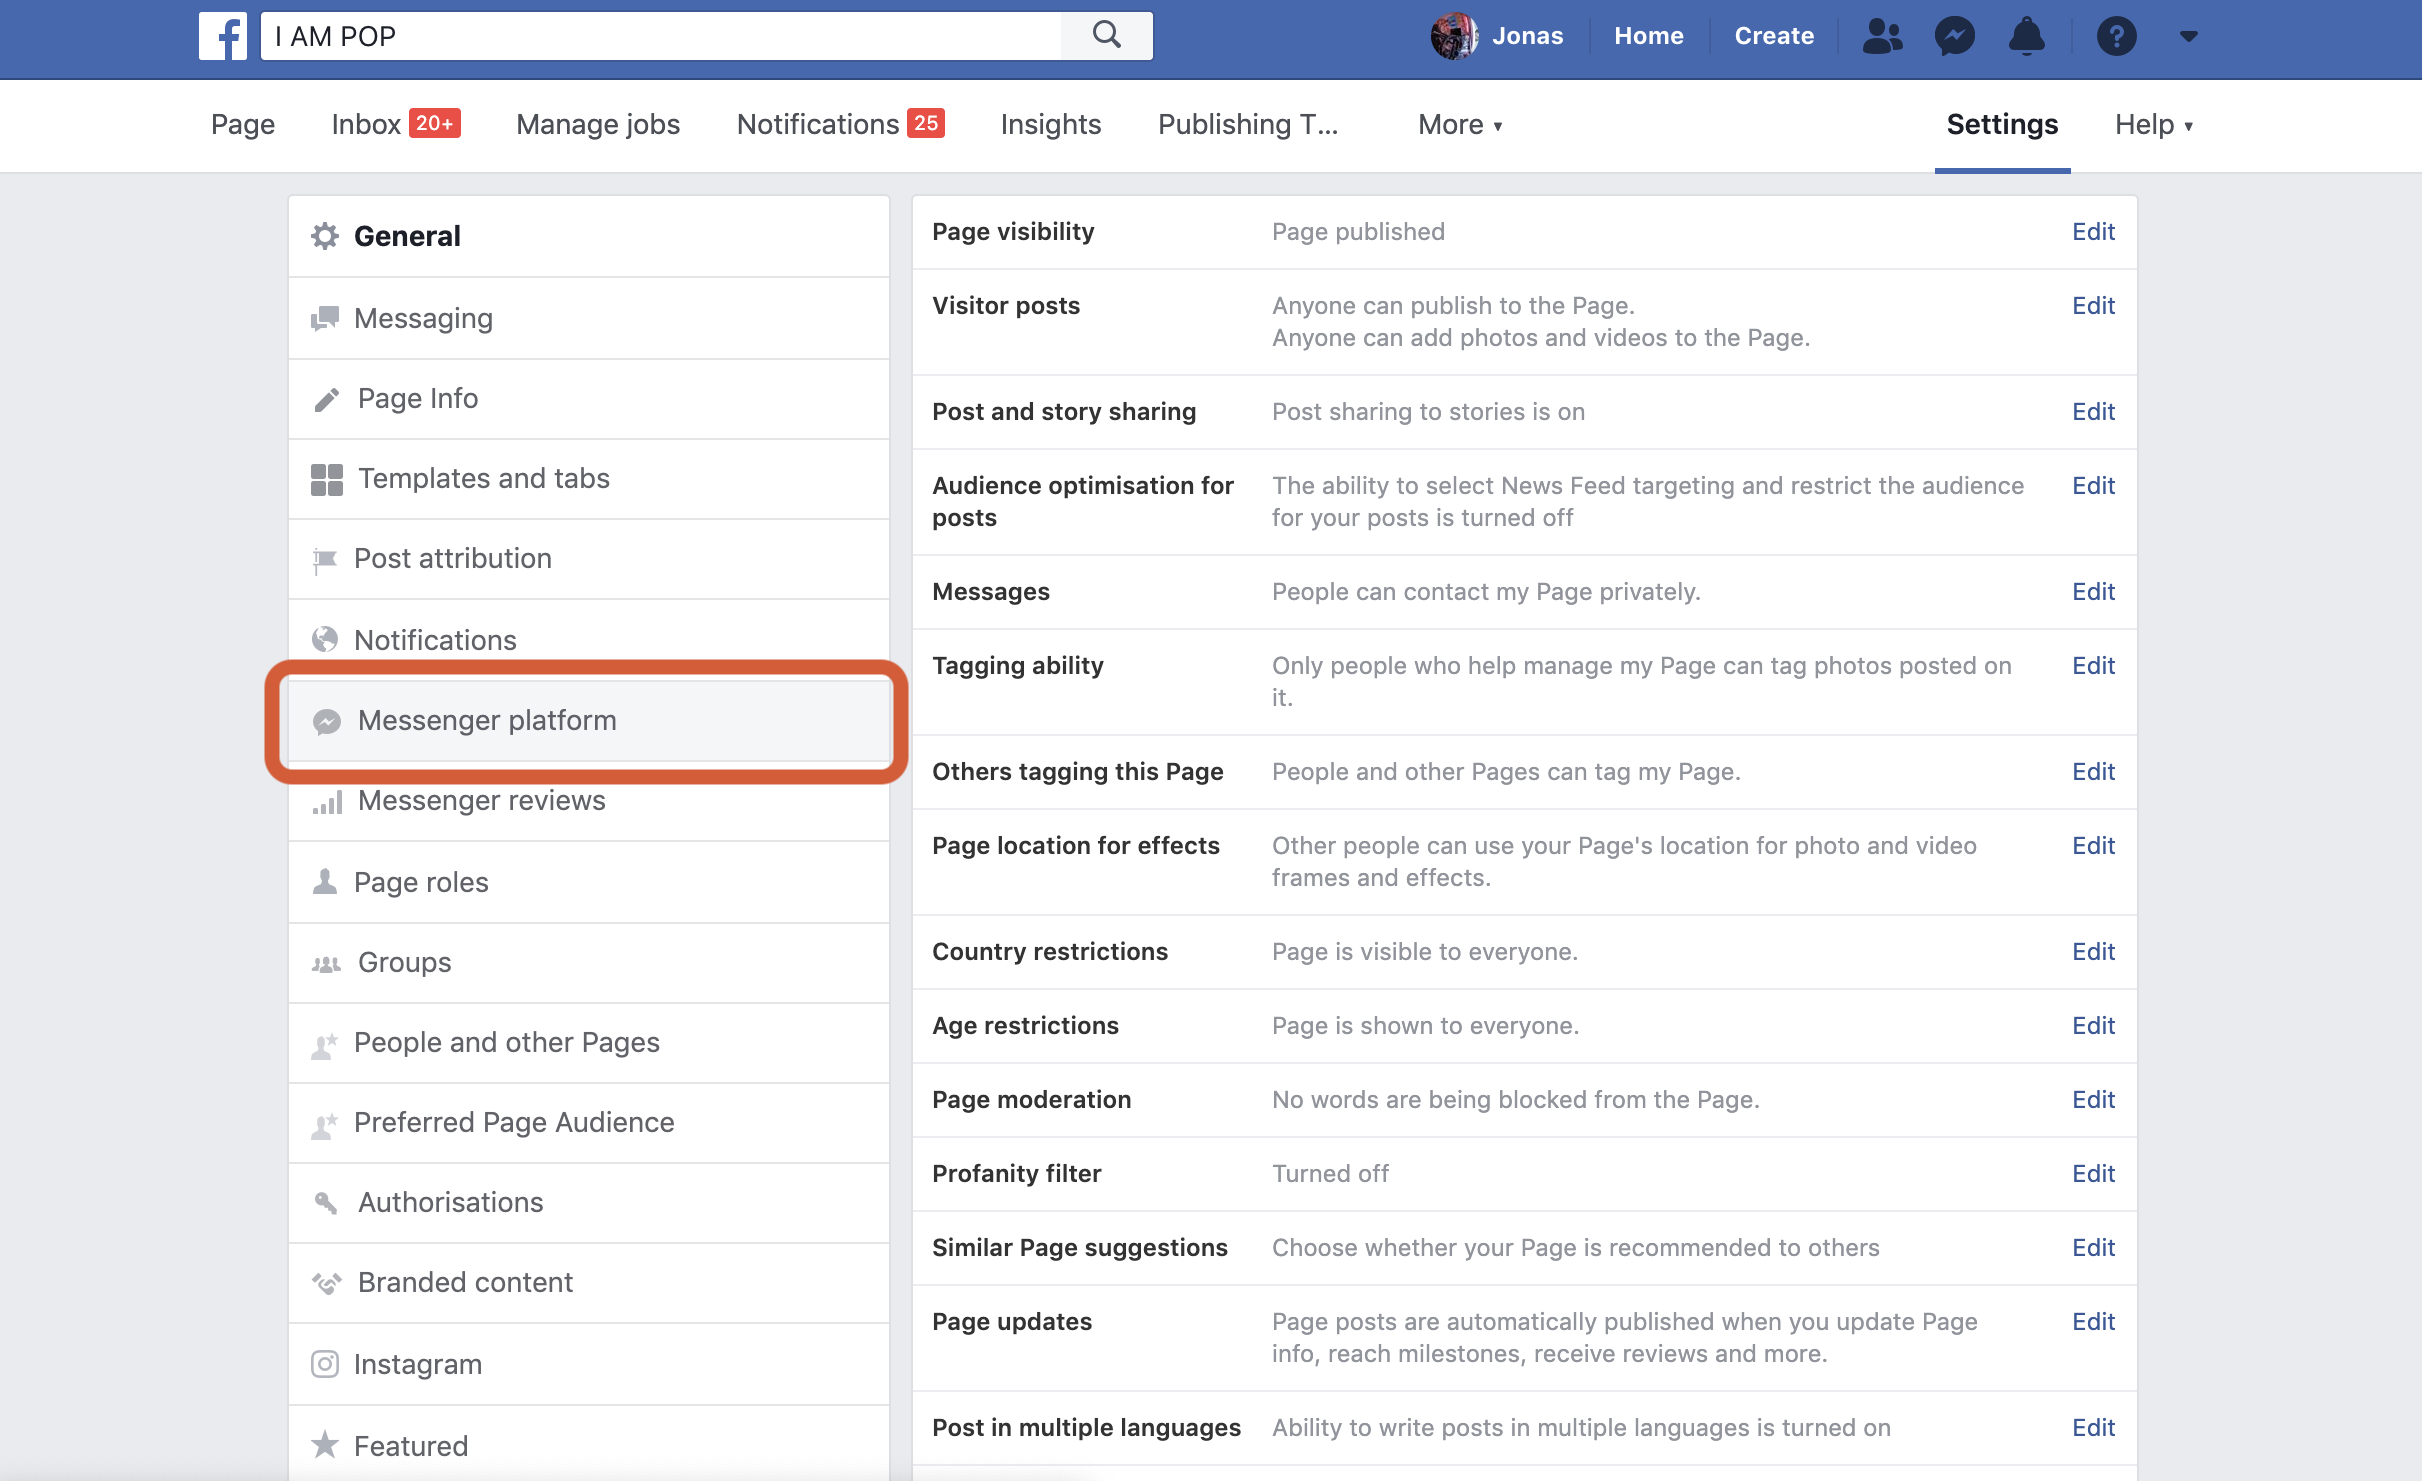
On the settings page, select the Messenger platform on the left side of the screen:
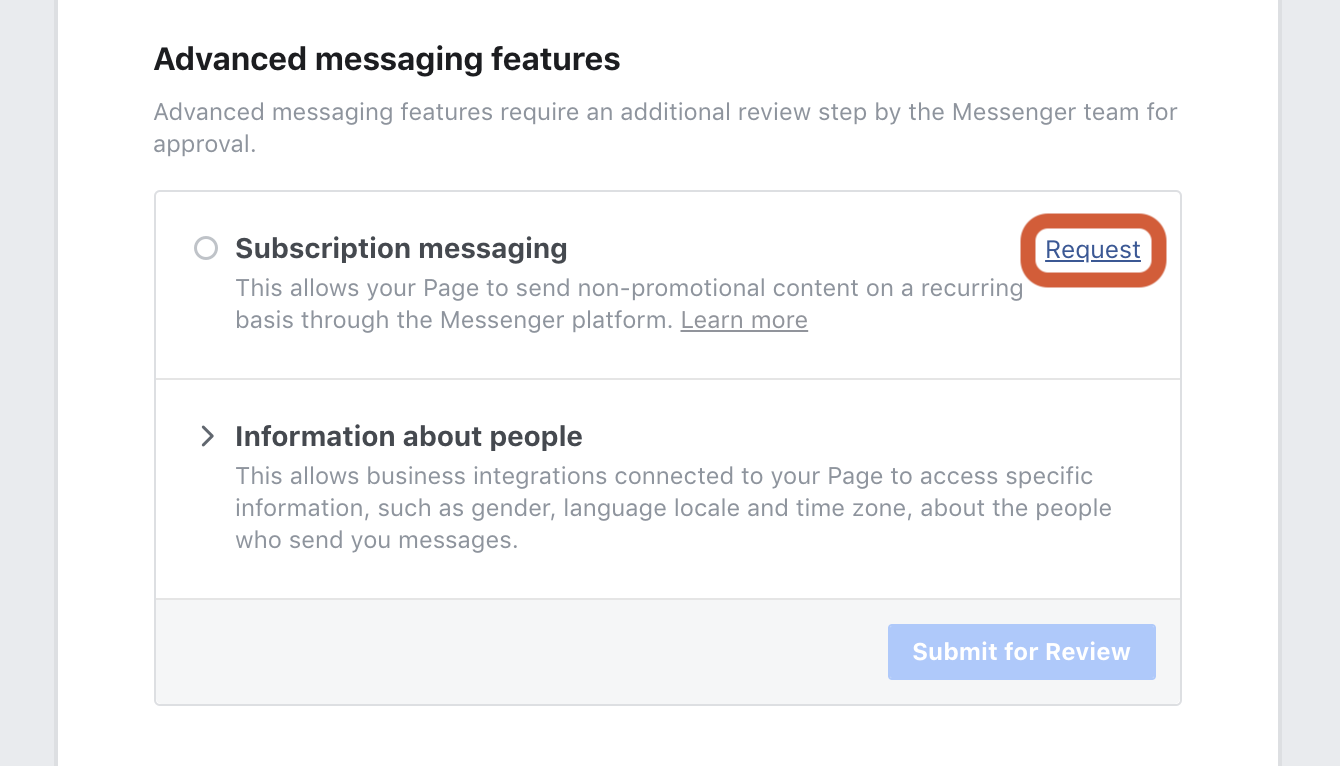
Scroll down until you see the ‘Advanced messaging features’ section. Here, you need to click on ‘Request’ to start your application:
You will be prompted to select the type of messaging you do, first. There are three options to choose from:
- ‘News’
- ‘Productivity’
- ‘Personal tracking’
Almost all of our users - and most other people too - will fall under the ‘News’ category, as the other two options are very specific.
Step 1: Requesting Subscription Messaging
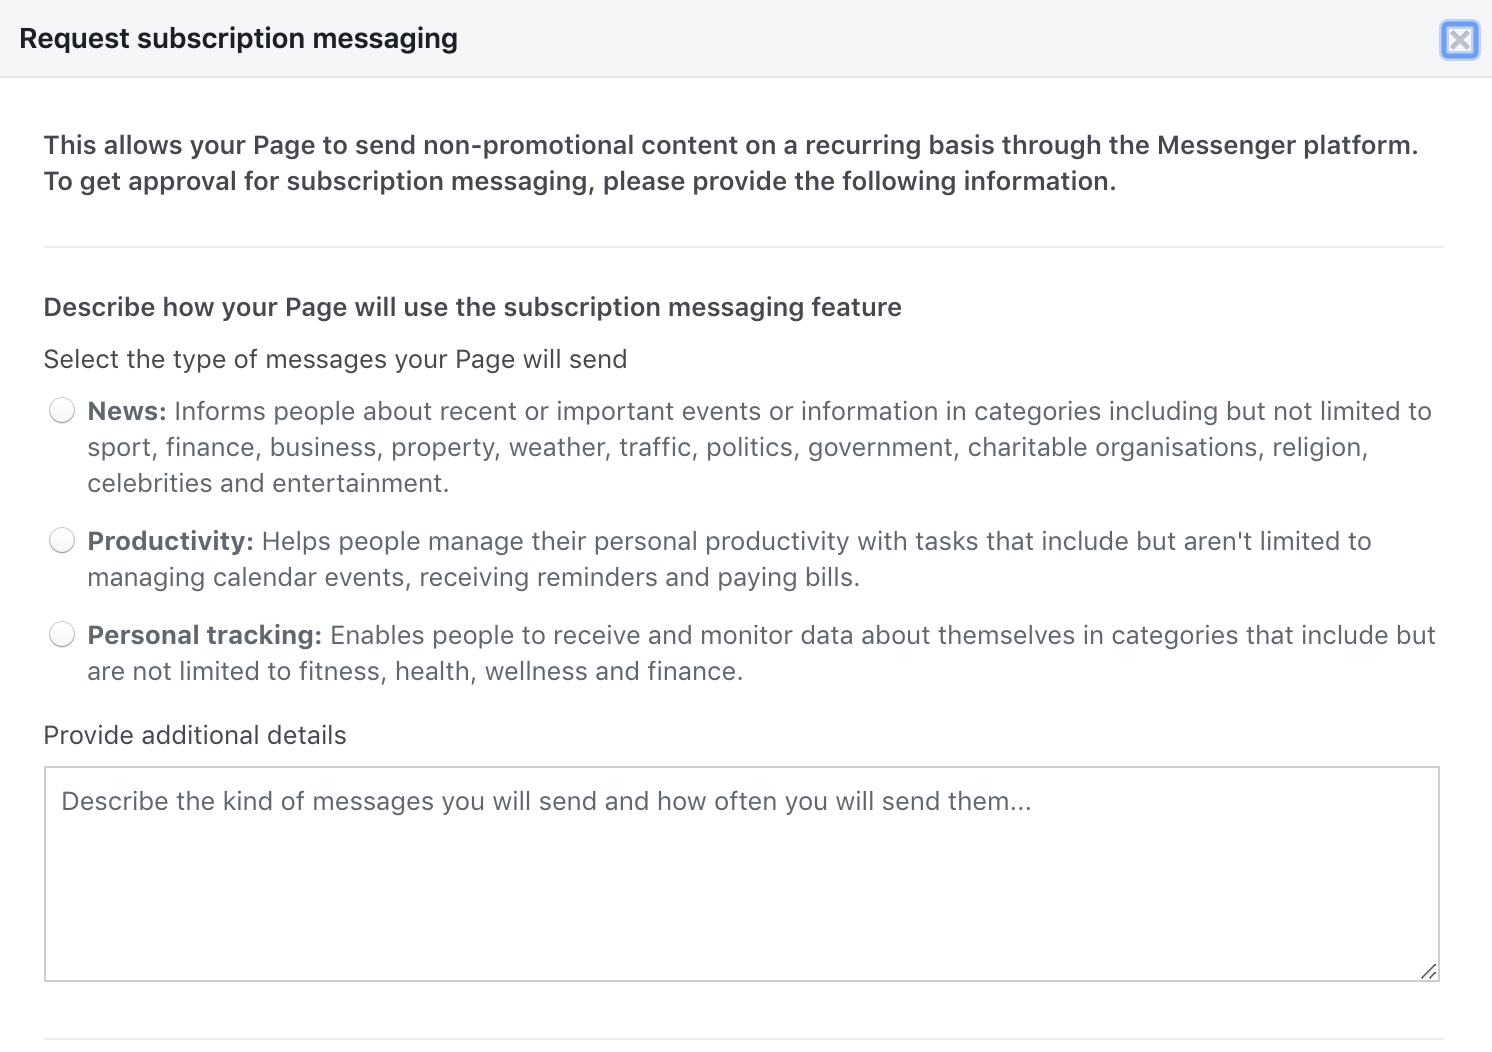
You will also have to describe the kind of messages you send and how often you will send them. There is a person manually reviewing your submission at Facebook, so be clear about the goals of the bot and the type of Subscription Messages you will send out.
In our case, we chose the 'News' category, and wrote something like:
“I AM POP will send regular company and industry news updates regarding the music industry, Messenger marketing and general developments in the field of direct messaging apps.”
Remember: you are not supposed to send promotional material via Subscription Messaging. This type of messaging is to be used for informational purposes. Also, we strongly suggest your bot's introduction flow matches the description of what type of messaging you will be doing.
Also: users automatically opt-in to receive Subscription Messages when they start a conversation; however, Facebook highly recommends that your bot asks permission to send Subscription Messages to ensure a positive user experience, and so do we.
Tip: The description section of the application gives you a chance to address your reviewer at Facebook directly. In addition to a simple description of what your channel is for, consider adding something like:
***Our channel is designed to inform our audience about key news, not for sending promotional content. We take every possible step to make opt in / out as easy and intuitive as possible via 3 levels. Firstly, the intro message asks whether they want to subscribe to a regular weekly update and saves those who respond ‘yes’ into a segment for updates. Secondly, anyone can easily subscribe / unsubscribe via the persistent menu at any time. Thirdly, there is an unsubscribe CTA at the end of each broadcast if people want to stop receiving messaging. We are 100% committed to not spamming people via Messenger and taking every step possible to maintain consent constantly***
Giving examples:
After this, you will be asked to provide some examples of the types of messages you send:
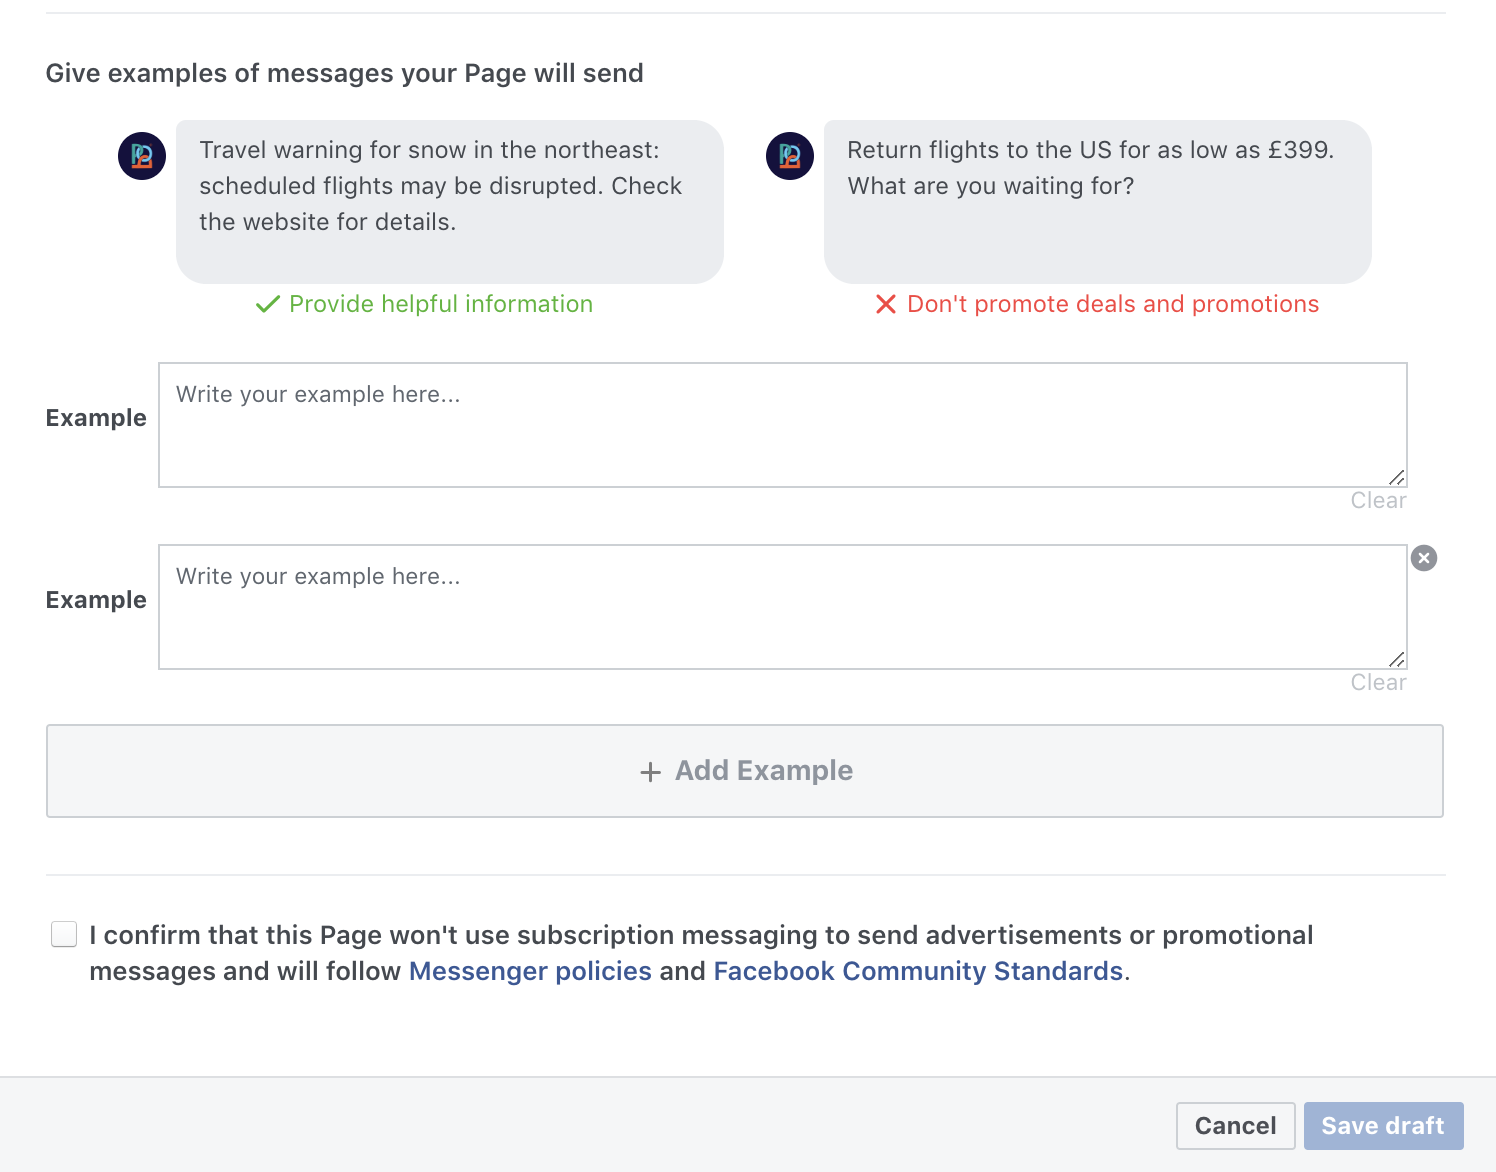
In our case, we gave examples like:
“Have you heard about Facebook’s recent F8 conference? Check out this article we wrote summarizing what this means for Facebook Messenger.”
“Buffer recently commented on the State of Social in 2019. What do you think marketers around the world have to say about social media, what’s working and how the industry is changing? Check out this website for more info.”
Examples of approved applications can be found here.
If you choose the 'Productivity' category, you could write something like this in the description:
“I will be sending free tips to help my subscribers improve their music career. My messages will be sent once a week or once every other week.”
In that case, use examples like these:
“Today's tip: if you want a record label to sign you, first you need to work on your brand. Create a fanbase and then the labels will come to you.”
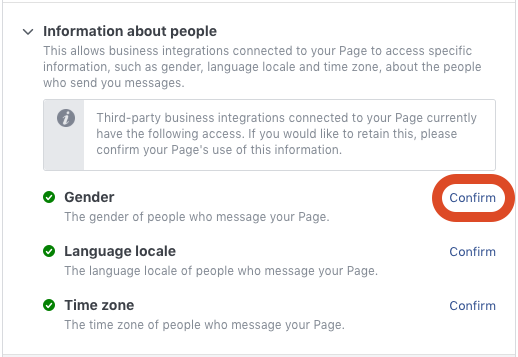
Step 2: Requesting I AM POP to access information about people
If you want to allow business applications like I AM POP to access specific info about your contacts, you need to request permission for this, as well.
In order to send scheduled messages by time zone, or create audiences based on language and gender, you need to do these steps.
Doing so is simple, as long as you copy and paste the examples we provide below.
First, click on the 'confirm' button next to one of the three options: gender, language locale or time zone.
You will see the following window. Just copy the example below and click on the 'Save draft' button.
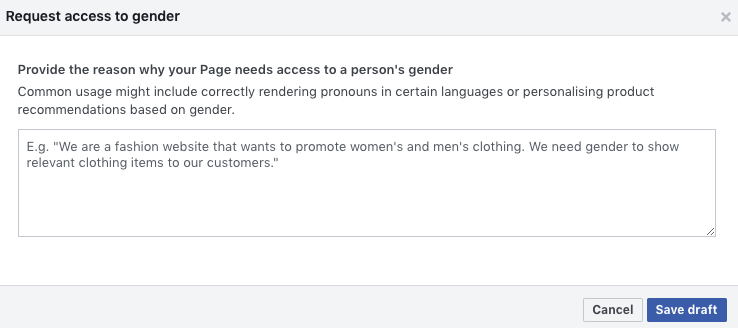
These are the examples you have to copy to have your requests approved. Just copy and paste them for each type of information:
Gender:
We need gender to be able to render pronouns in certain languages.
Language locale:
People all over the world send us messages and we want to communicate with them in their native language.
Timezone:
We will be sending news updates and we want to send them during certain times of the day, so that people do not receive messages at night.
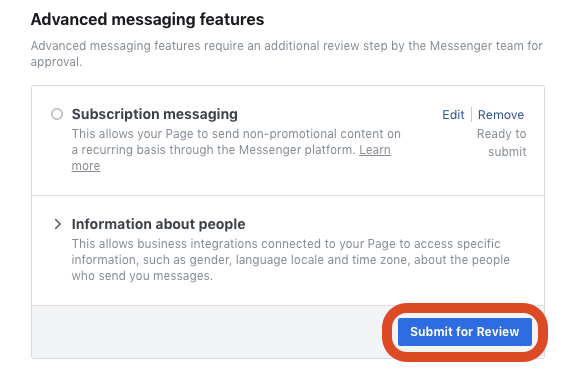
Step 3: Submit for review
After saving your draft, don't forget to click on the 'Submit For Review' button!
The reviewing process is done manually, so it might take a while before your application has been processed.
If you don't pass the review the first time round, don't worry. Just keep applying until you are granted permissions. You can do this as many times as you wan't. Remember: Subscription Messaging is for non-promotional messaging only. If your description or examples are promotional in nature, change them so they conform to Facebook policy.
This is what the ‘Advanced Messaging Features’ section will look like when your application has been approved:

You will also get a Facebook notification when your application has been approved/rejected. In case you get rejected, send us the screenshots you took of your description/examples, and we will advise you on how to best proceed!